


It’s that time of year where we in America give thanks. Some iffy history aside, there’s much to be thankful for. Personally, I would like to give thanks to everyone who left such supportive comments on my last blog post about my one year blog-aversary! Again, all of this would not be possible without you guys, so thank you all so, so much. I don’t I’ll ever be able to express my love and gratitude.
With this spirit in mind I wanted to put together an awesome and glamorous autumn tutorial that you could wear to Thanksgiving dinner- and well, half of that was accomplished. At the moment, I am sick so I wasn’t able to produce the type of quality content and tutorial that I normally do. I even debated not even going forward with this post, but decided to tough it out for you guys. So instead of the glam Thanksgiving face I wanted to put together, here is a quick tutorial to look put together, even if you feel under the weather like I feel at the moment. However, if you do want a full tutorial, you can check out my Fall Lookbook and draw some inspiration from there!
Now, let’s get started!
Face


- Prime the face. During the holidays I usually end up taking a lot of photos with my family, so I use my Smashbox Photofinish Primer to smooth everything out for the camera.
- To add just the right amount of luminosity and glow to the face, I mix this Buxom Divine Goddess Luminizer into my Revlon Colorstay Foundation, which is full coverage and keeps the face matte. It also doesn’t have any SPF so that there will be no flashback in photos.
- To conceal heavy darkness and bags under the eyes, I’m using my sample of It Cosmetics Bye Bye Under Eye, which is perfect for hiding the fact that I’m sick.
Eyes

- I primed the lids with my Lorac Behind the Scenes Eye primer. It really mattifies and smoothes the area for an easy application.
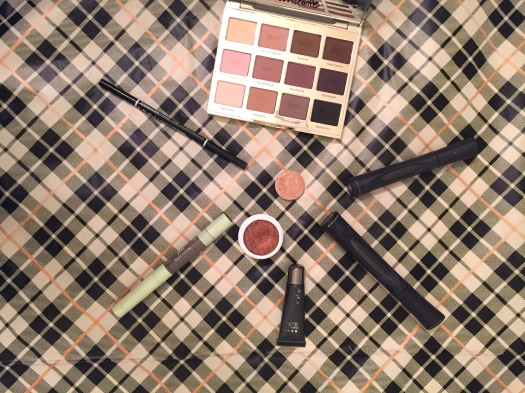
- I applied the yellow toned cream color Free Spirit from the Tartelette palette all over the area with a blending brush to make the shadows blend easier. I will be using the whole top row from the palette for this look.
- With a fluffy blending brush, I applied the light medium tan Force of Nature through the crease to set up a base for all of the blending.
- With a small pointed crease brush, I began to build up the dimension in the corner using the medium brown shade Dreamer.
- On the lid, I used a flat shader brush and packed on the Makeup Geek Foiled Shadow in Magic Act all the way into the inner corner to double as the highlight.
- With a detail brush, I blended the outer corner into the gold using the darkest shade Multi Tasker in the Tartelette palette. I also ran it under the lower lashline to smoke it out.
- To blend the middle third of the crease with the lid and outer corner, I took a little of Colourpop’s Shadow Boyband on a fluffy brush.
- I used the Younique 3D Lash Fiber + Mascara duo to pump out my lashes.
- To keep things simple, I avoided using liner and went straight to the brows. I used the NYX Micro Brow Pencil in Brunette to fill and shape the brows. Then, to keep them in place I used the gel end of the Pixi Brow Duo to keep stray hairs away.
Cheeks


- For contour, I started with the NYX Wonder Stick and blended it out with a Beauty Blender. I layered a mixture of Java and Fawn from the Anastasia Contour Kit to intensify the contour.
- For blush I used my new Tarte Bling It On palette and took Beaming on the apples of my cheeks.
- For highlighter, I mixed Becca and Jaclyn Hill Champagne Pop with Gerard Cosmetic’s Audrey Starlight Powder for a golden, beaming sheen on the tops of the cheekbones.
Lips

- I finished off the look with a simple red lip. This NYX Simply Red Lip Cream Pencil in Knock Out is super opaque and easy to apply, but if you want a real long lasting look, you can line the lips. I used the NYX liner in Plum.

That’s it for this week! Sorry that it was a short one. What are you thankful for this Thanksgiving? Let me know in a comment below or on social media using the following links!
All my love,
Megan
Instagram || Twitter || Google+ || Pinterest || Bloglovin’ ||Facebook

Love it Megan! And the colors are so totally fall. I have got to get my hands on that Tartlette pallet!
LikeLiked by 1 person
Thanks Liz! It’s a great palette- lots of good blending shades & they’re all matte! Have you seen the new Tartelette 2 palette?
LikeLike
Nope! I definitely need to get acquainted with it though~
LikeLiked by 1 person
It’s soooo pretty & it has 3 shimmer shades too! If you’re really into Browns it’s beautiful
LikeLike