


Hello, Internet! Long time, no blog. In case you missed my Instagram explanation (if you did, why aren’t you following me on there?) I’ve been gone for an amalgam of reasons that are personal and some of which will be explained in a bit, so keep reading. Long story short, I’ve been overwhelmingly busy and needed a breather. That said, thanks for your patience.
This week, I’m doing something a bit different, as you can tell by the title. Some of you might be wondering, “Who is Leilani?”.
Leilani is my sister. My little sister, in fact, and as of Monday she just shipped off to college out of state. It’s been emotionally overwhelming and has put a lot of things in perspective for me, personally. I’m so proud of her and I’m going to miss her so much!
Wow, all that sappiness sounds like she’s going away forever. I know I’ll see her soon, but in the meantime I’ve put together my first blog post with a model, and a very special model at that.
I designed this tutorial as part of a short Back to School series that will be present every other Wednesday on the blog, so be sure to stay tuned! I also kept in mind my sister’s personal tastes when cultivating this look, hence why it is “Leilani’s Tutorial”.
My sister loves shimmery shadows and a focus on the eyes. She has beautiful skin which barely needs any touching up and she likes a subtler cheek and lip. This is her personal taste, so this look may not be for everyone, as I didn’t design it to be. Anyhow, it is a beautiful look that is simple enough to complete quickly and is perfect for any first impressions you might have.
When you start college, you have a lot of little events to attend, so why not put your best face forward? You meet your roommate, your roommate’s family. You go to orientations and meet people in your hall. You might even rush for Greek life or join a club. Professors, RAs, faculty, you name it. You shake a lot of hands and get a lot of Facebook friend requests your first week of school. This is the vibe I kept in mind when I put this look together. Now, let’s get started!

- Leilani got the good genes and has a gorgeous complexion. She has no blemishes! All I did here was apply a bit of concealer under her eyes and on her highlight points to give a subtle glowy effect. I used Maybelline Age Rewind under her eyes, and Maybelline Dream Lumi Touch down her nose bridge, in between her brows, on her chin and cupid’s bow. If you have oiler skin, maybe try applying a light primer first. I recommend Smashbox Photofinish Primer Water. If you want more coverage and need help finding a foundation, refer to this post.
- For the eyes, Leilani likes warm, neutral, shimmery shades. I started with the usual Urban Decay eye primer all over the lid. Following up with a fluffy shader brush, I swept the Gold color all over the lid from the Lorac Pro Palette. With a clean blending brush, I buffed out the edges so there were no harsh lines. In the crease, I applied Taupe to blend and layered Garnet over the top with a fluffy crease brush. With a fluffy pencil brush, I blended Pewter into the outer corner to enhance the shadow around her eye, but blended it well enough to make it not too dark. Using a light hand, I only barely touched my stiff dome blending brush into the Cream shade and used it to blend out the outer edges. With a smudge brush I applied the Gold to the lower lash line to bring lightness to the bottom of the eye. Finally, I put a bit of Champagne to the inner corner for a subtle highlight. This color combo is great for this transition period from summer into fall! It has autumn tones, but the light shimmer makes it still late summer appropriate.
- Curl the lashes and apply mascara. Normally Leilani uses Urban Decay Cannonball, but she packed it and had used my Maybelline The Rocket instead. To open up the eyes a bit, I applied a bit of NYX Wonder Pencil to the waterline, which is a nude multipurpose pencil. I lined the top lash line with my Kat Von D Tattoo Liner in Trooper with a basic thin line to make sure the look remained undramatic. I finished off the brows by slightly defining and shaping them with my Pixi Natural Brow Duo.
- For contour, I wanted to keep it simple. I know this looks very dark, but my sister has a wonderful tan complexion so this terracotta brown shade Havana, from the Anastasia Contour Kit in Light Medium, looked perfectly natural on her. The red undertone paired nicely with the Garnet shade on her lids. I put this color in the hollows of her cheeks with my flat contour brush and to prevent any harsh edges. I blended it out with a fluffy angle brush. With the same brush, I took Laguna Bronzer (this is a mini) over the contour to diffuse it even more and warm up the face. I also didn’t want too dramatic of a look so I took Laguna over her temples, jawline, and forehead instead of the contour powder to keep the look more low key, but still bronzey.

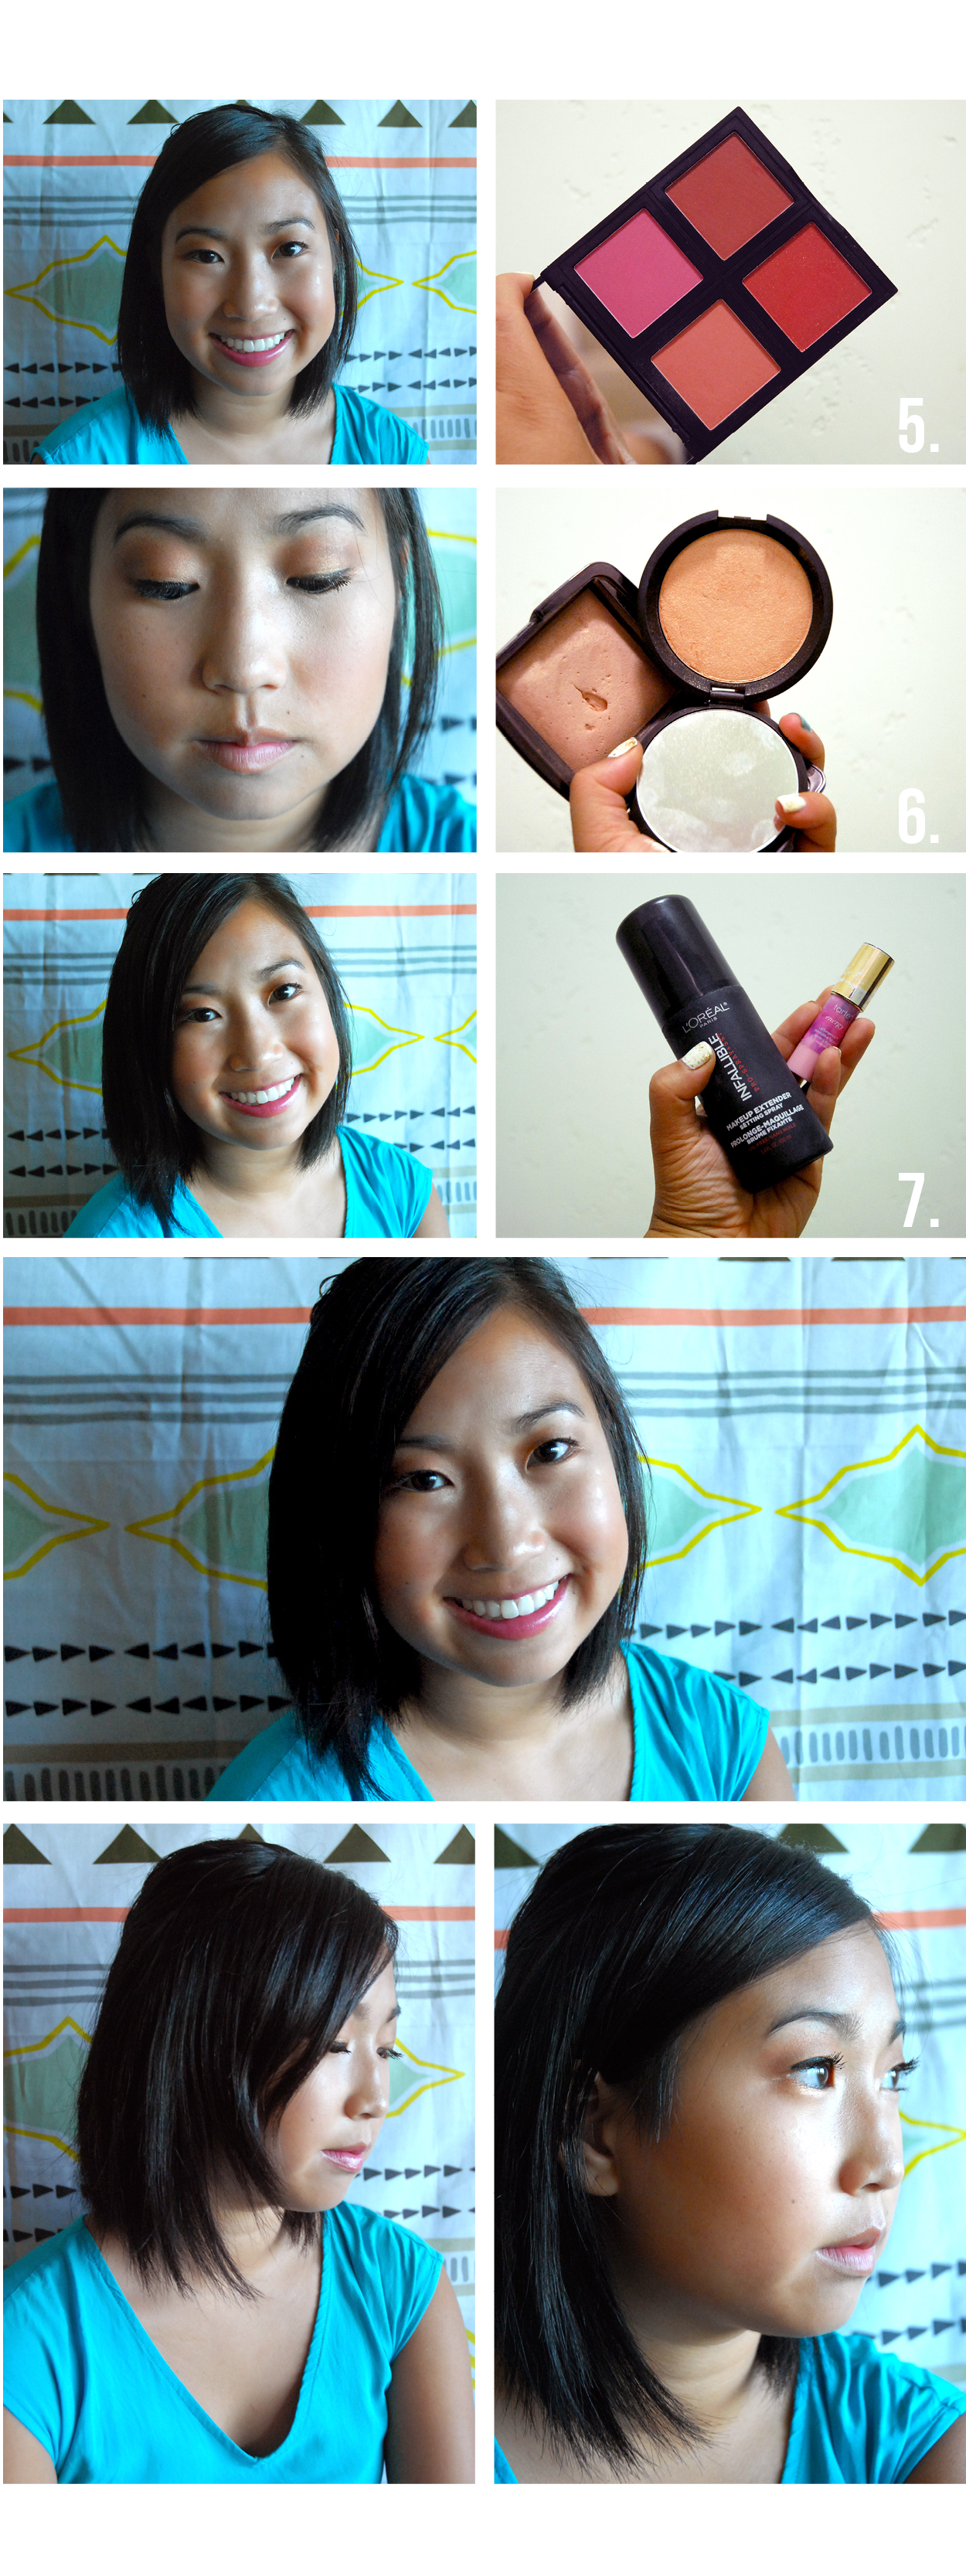
- Using the coral blush shade (bottom left in picture) from the Elf Blush Palette Dark. I focused the color on the apples of her cheeks, just to add a bit of color.
- I highlighted the tops of her cheekbones with the Hourglass Ambient Lighting Powder in Radiant mixed with the Jaclyn Hill x Becca Cosmetics in Champagne Pop. The combination is the perfect copper shade in-between bronze and gold!
- I finished off with the Tarte Lip Surgence Skintuitive Lip Tint which is a subtle way to add a bit of color to your lips. It naturally enhances your lip color with a lightweight balm feel. Finally, I topped it off with the L’Oreal Pro Infalliable setting spray. This spray is better for normal to dry skin types, which is what my sister has. If you are oily, like me, this spray won’t be enough so you might want to powder as well.
That’s it! I hope you enjoyed this tutorial and seeing my beautiful sister’s face! I can’t wait until I get to see her when she comes home, but until then, I wish her the best on her first semester of college! I love you Leilani!
Are you headed back to college too? If so, I have an offer for you! Use “DECOR10” at Target.com’s checkout to receive 10% off select college gear! This includes the (very wrinkly, sorry) tapestry that I used as the background behind Leilani in these photos and my very own bedding that I’ve used in my own dorm room for two years now!

Have a wonderful back to school season, all! If you would like to see a post on dorm decor ideas, leave me a comment below or on social media using the following links.
All my love,
Megan
—
Instagram || Twitter || Google+ || Pinterest || Bloglovin’

Great tutorial! Champagne pop looks so stunning on you ❤
LikeLike
Actually this is my sister modeling for me in this tutorial but thanks anyways 🙂
LikeLike