


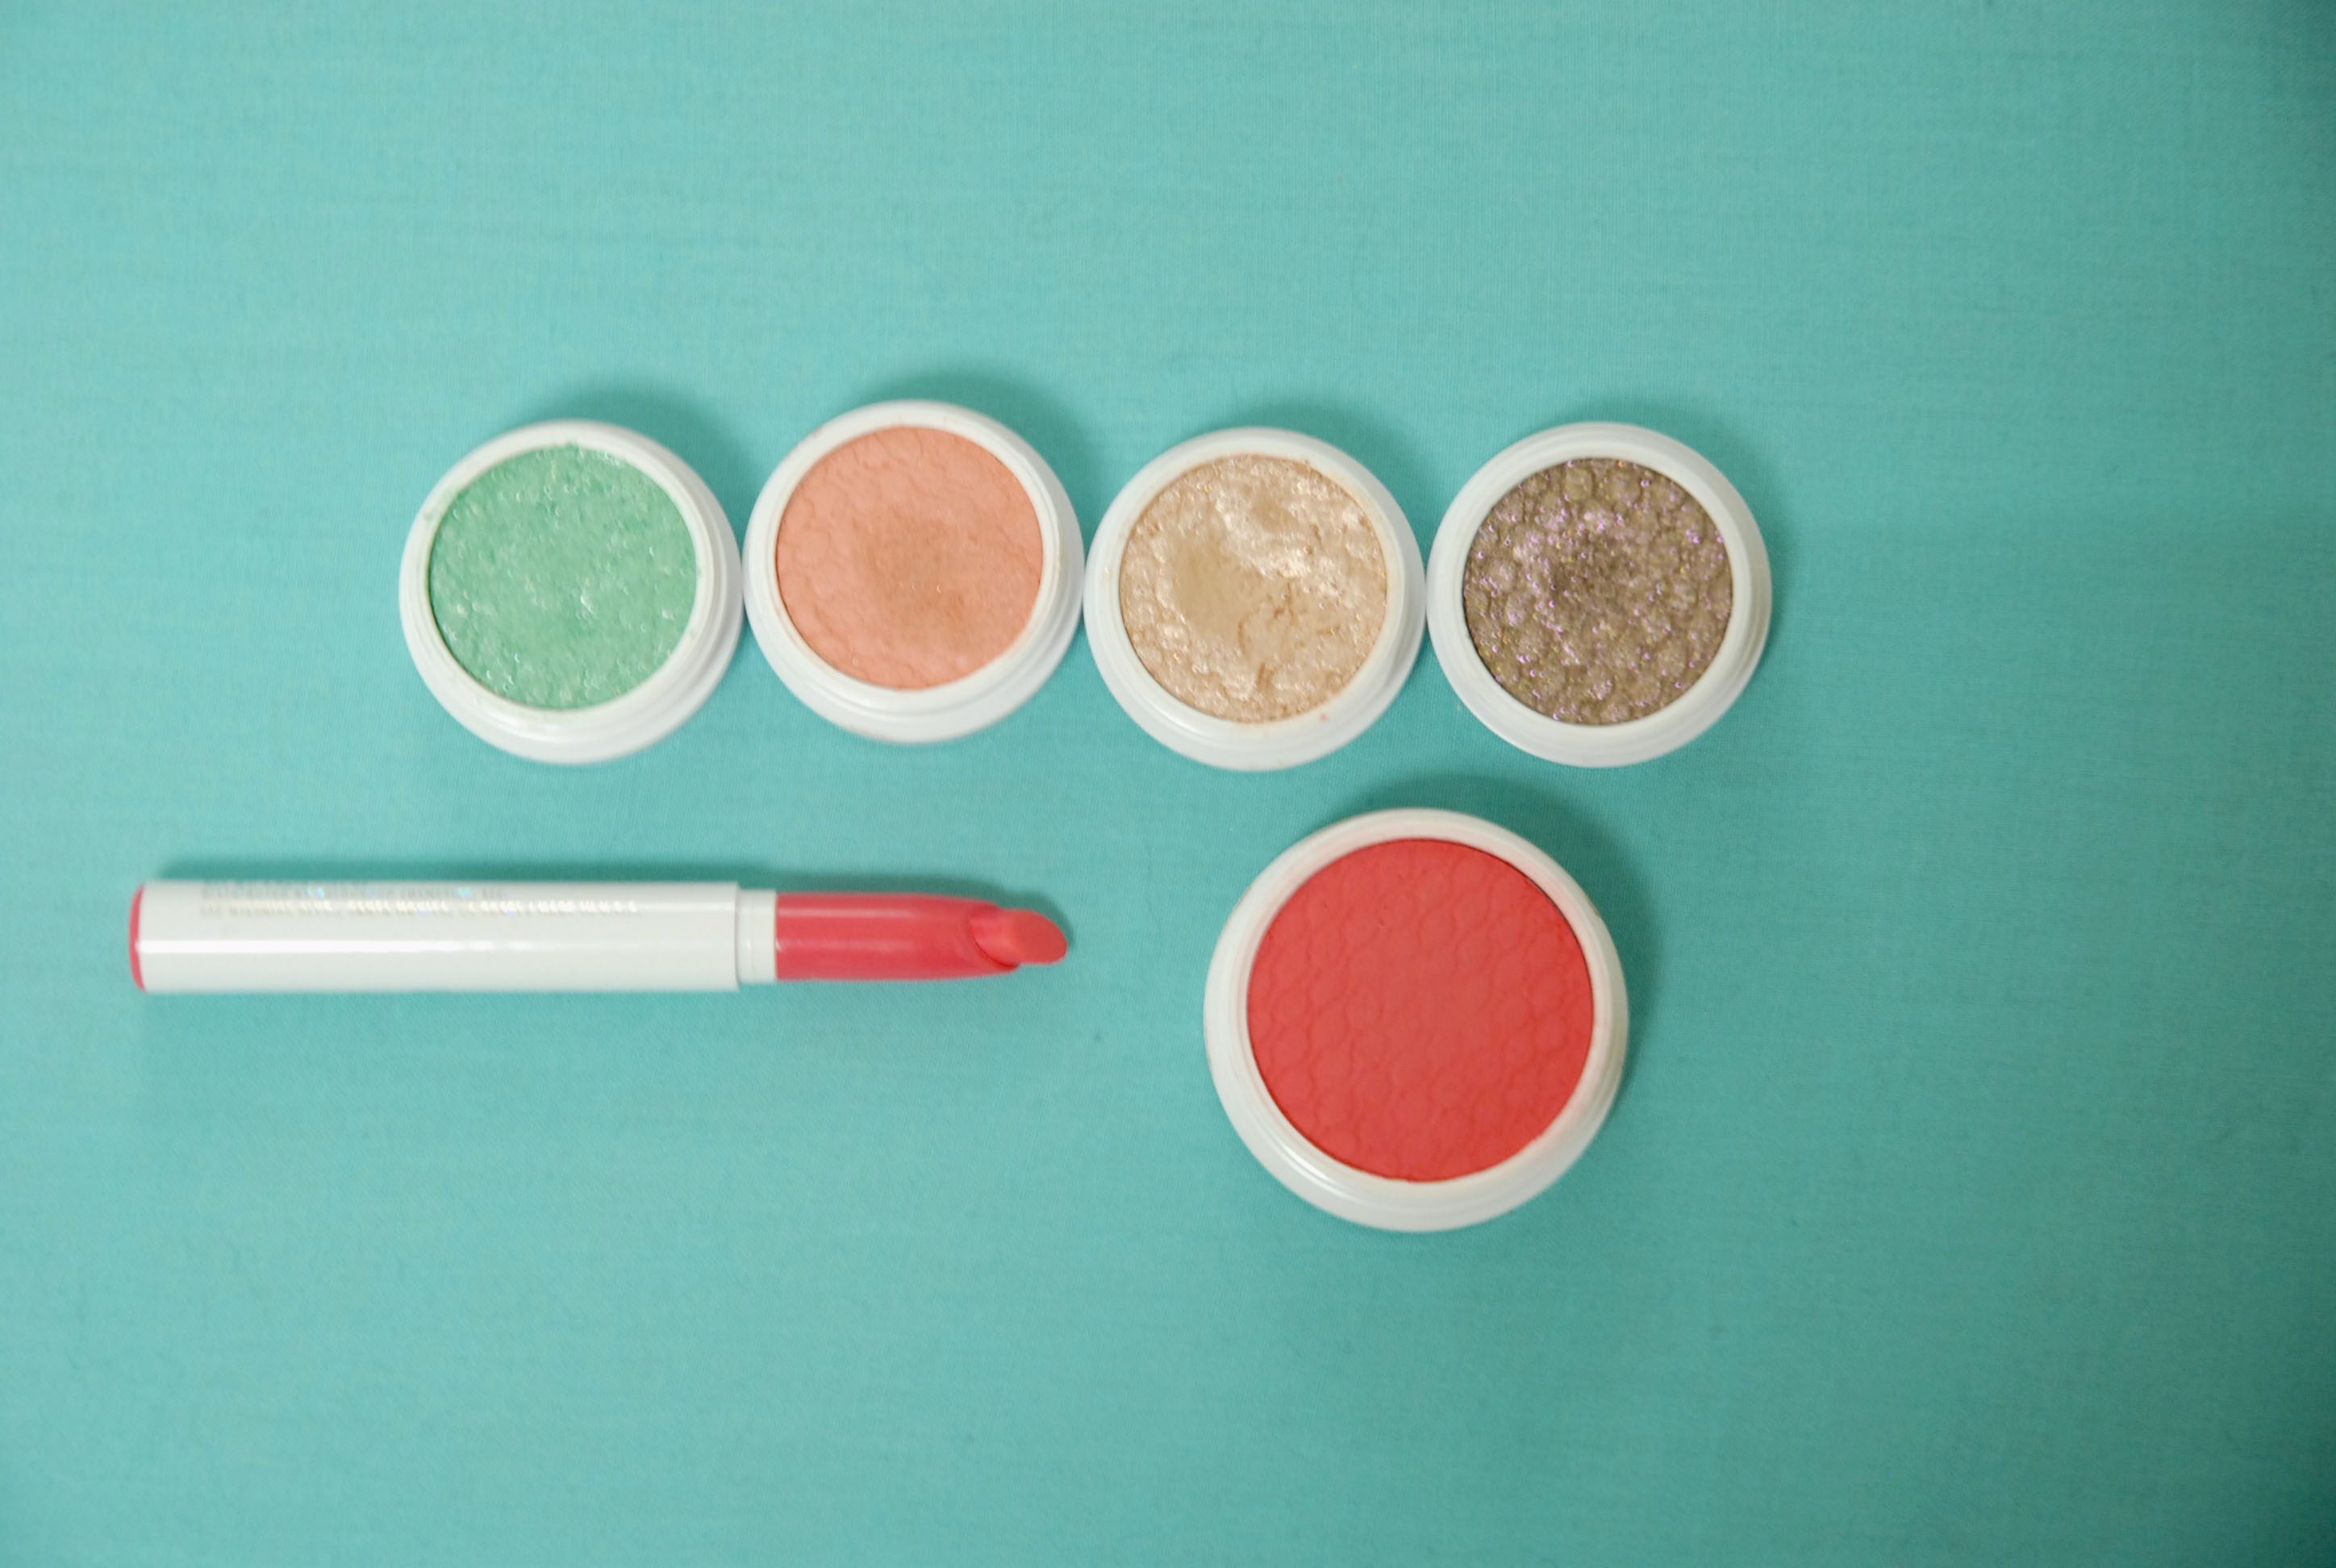
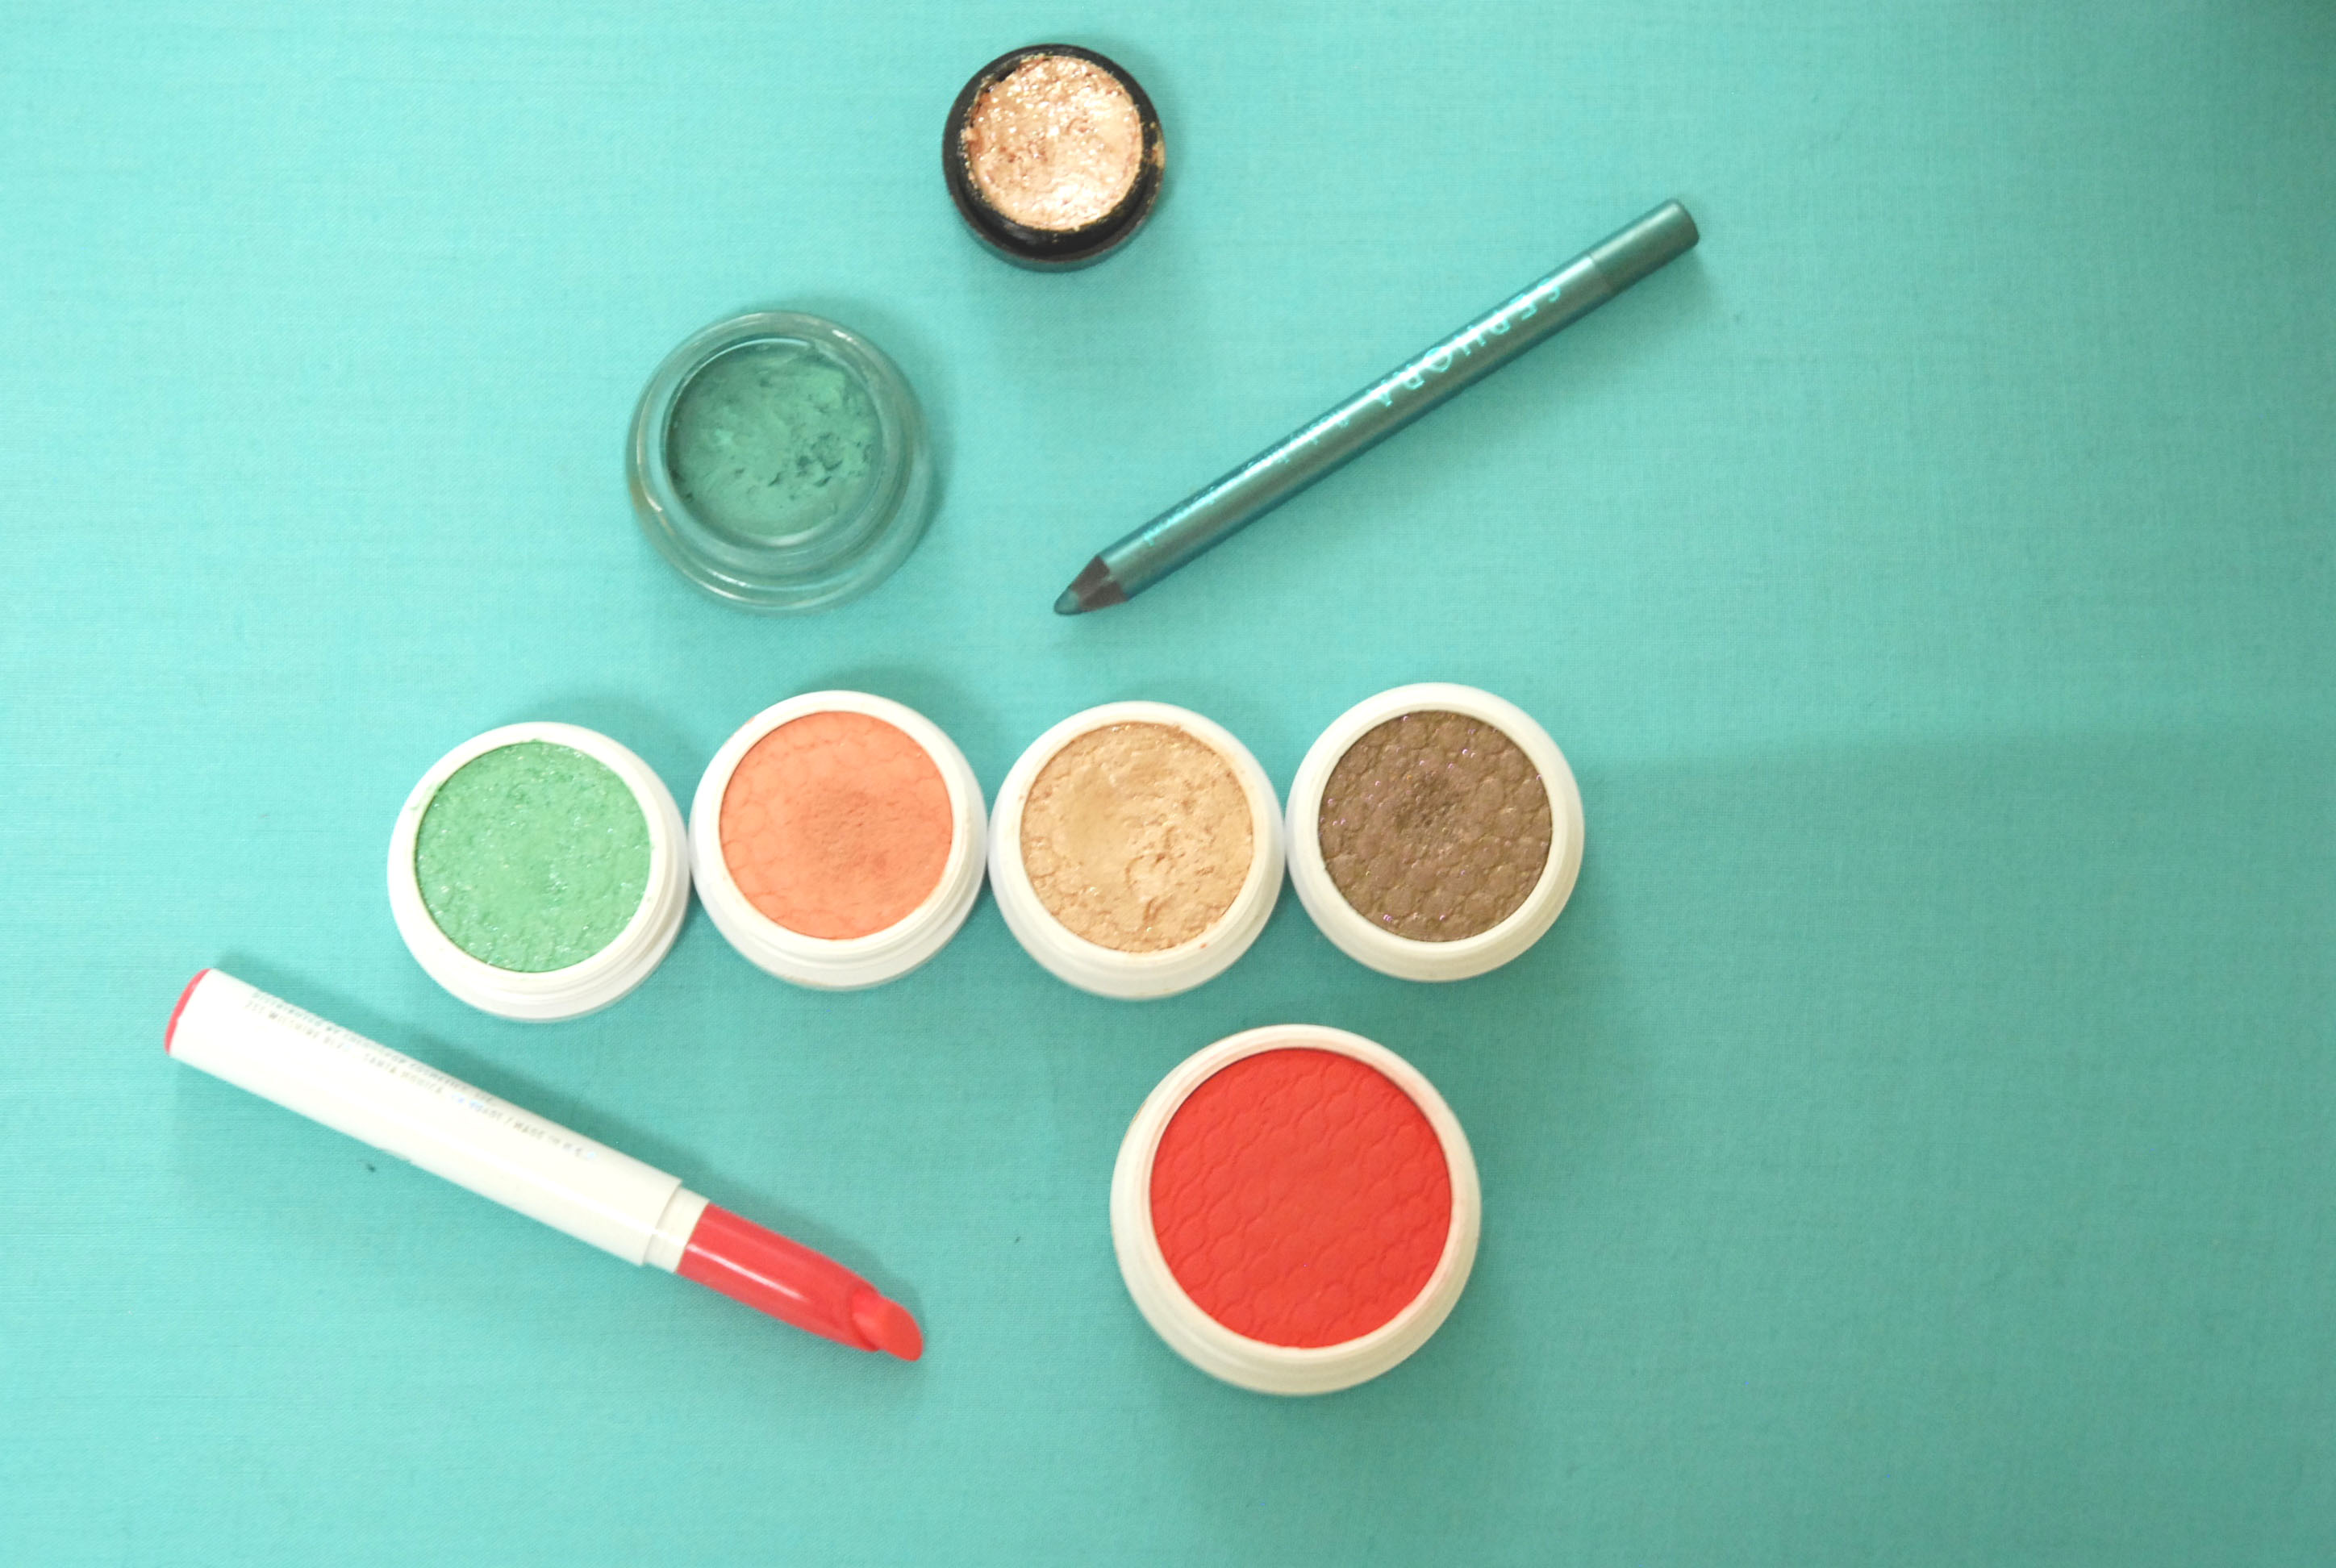
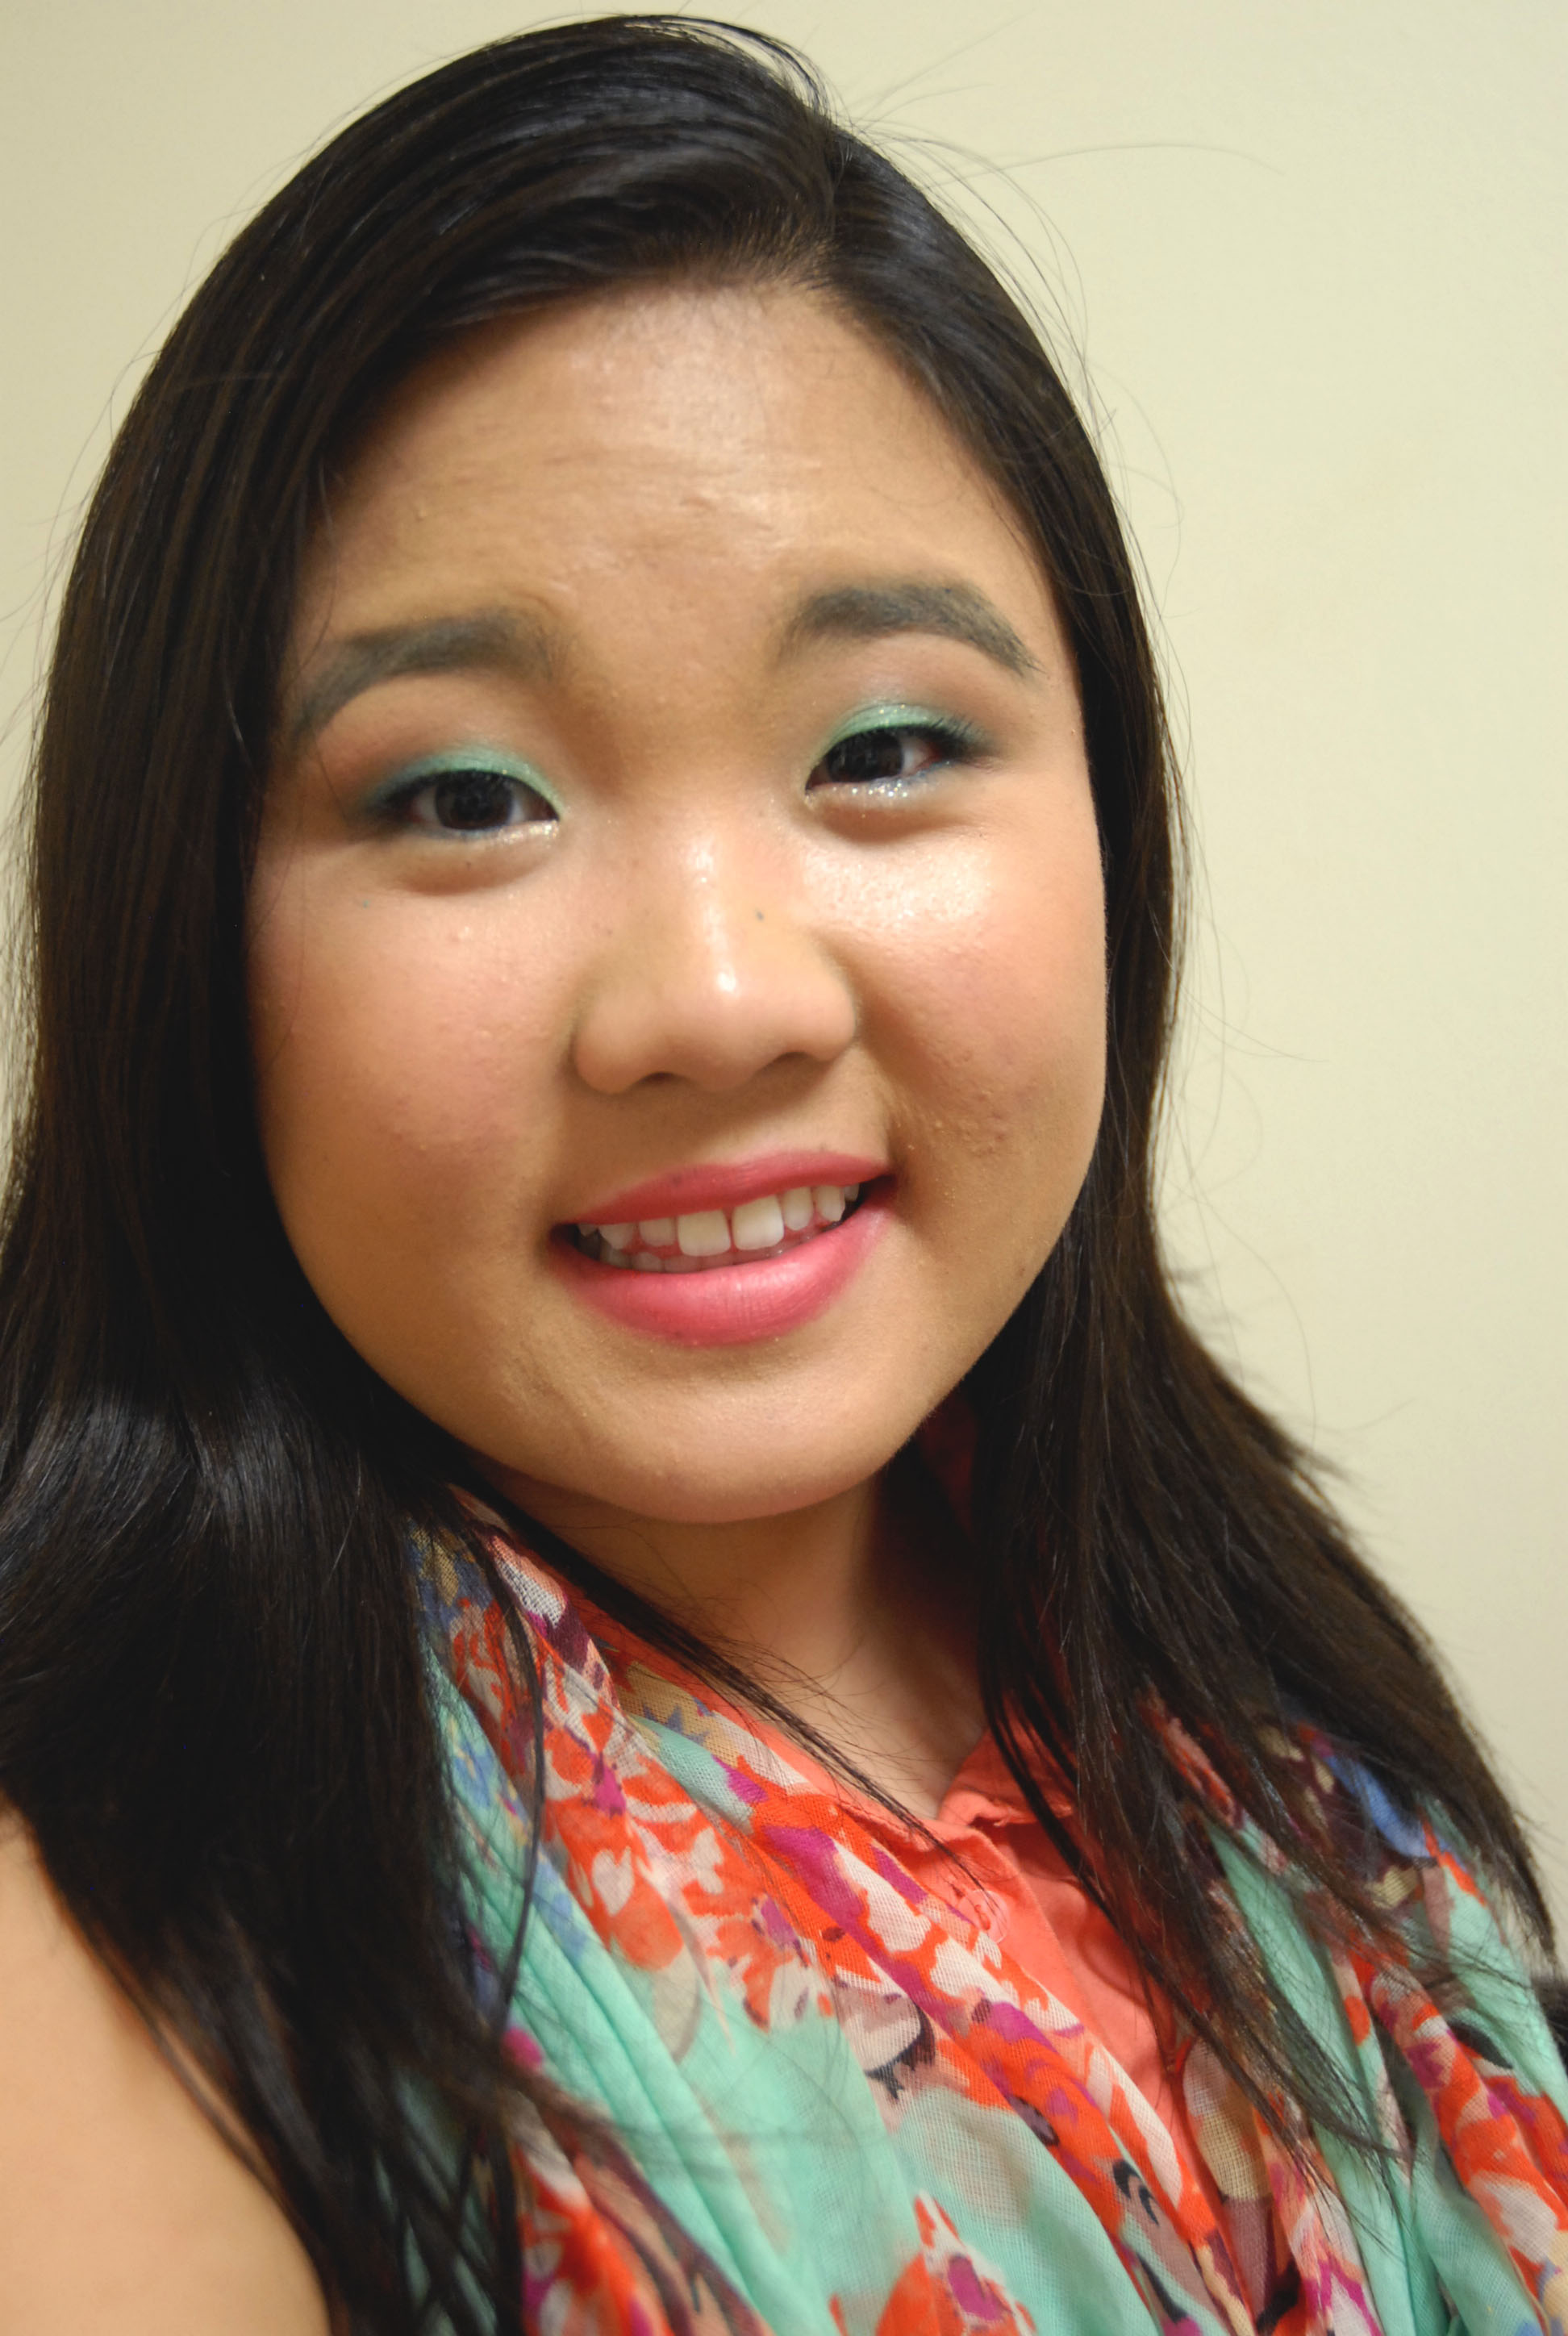
Spring has sprung! Hello all and happy spring break to you… well, at least for me. Whether or not you’re on a vacation, the first official day of spring was just this Friday, marking the return of bright colors to wardrobes around the world. That said, I wanted to use some of those spring colors in a makeup tutorial for you. For this color palette, I chose a trendy pairing of mint and coral that has been popular for a few seasons now. Also, I wanted to feature the brand Colourpop Cosmetics who I’ve been following for a while now and finally placed an order from (if you follow me on Instagram, you’ll have seen a sneak peek!). They have become very hyped up in the beauty community lately for their amazing quality at such a low price! Their eyeshadows and lip products are $5 each and blushes are $8. All of their products are vegan and cruelty free and I can’t wait to share my findings with you guys. If you’re interested, please keep on reading!

Please note that I have already applied my foundation and eyeshadow primer and done my brows, so without further ado, let’s get started!
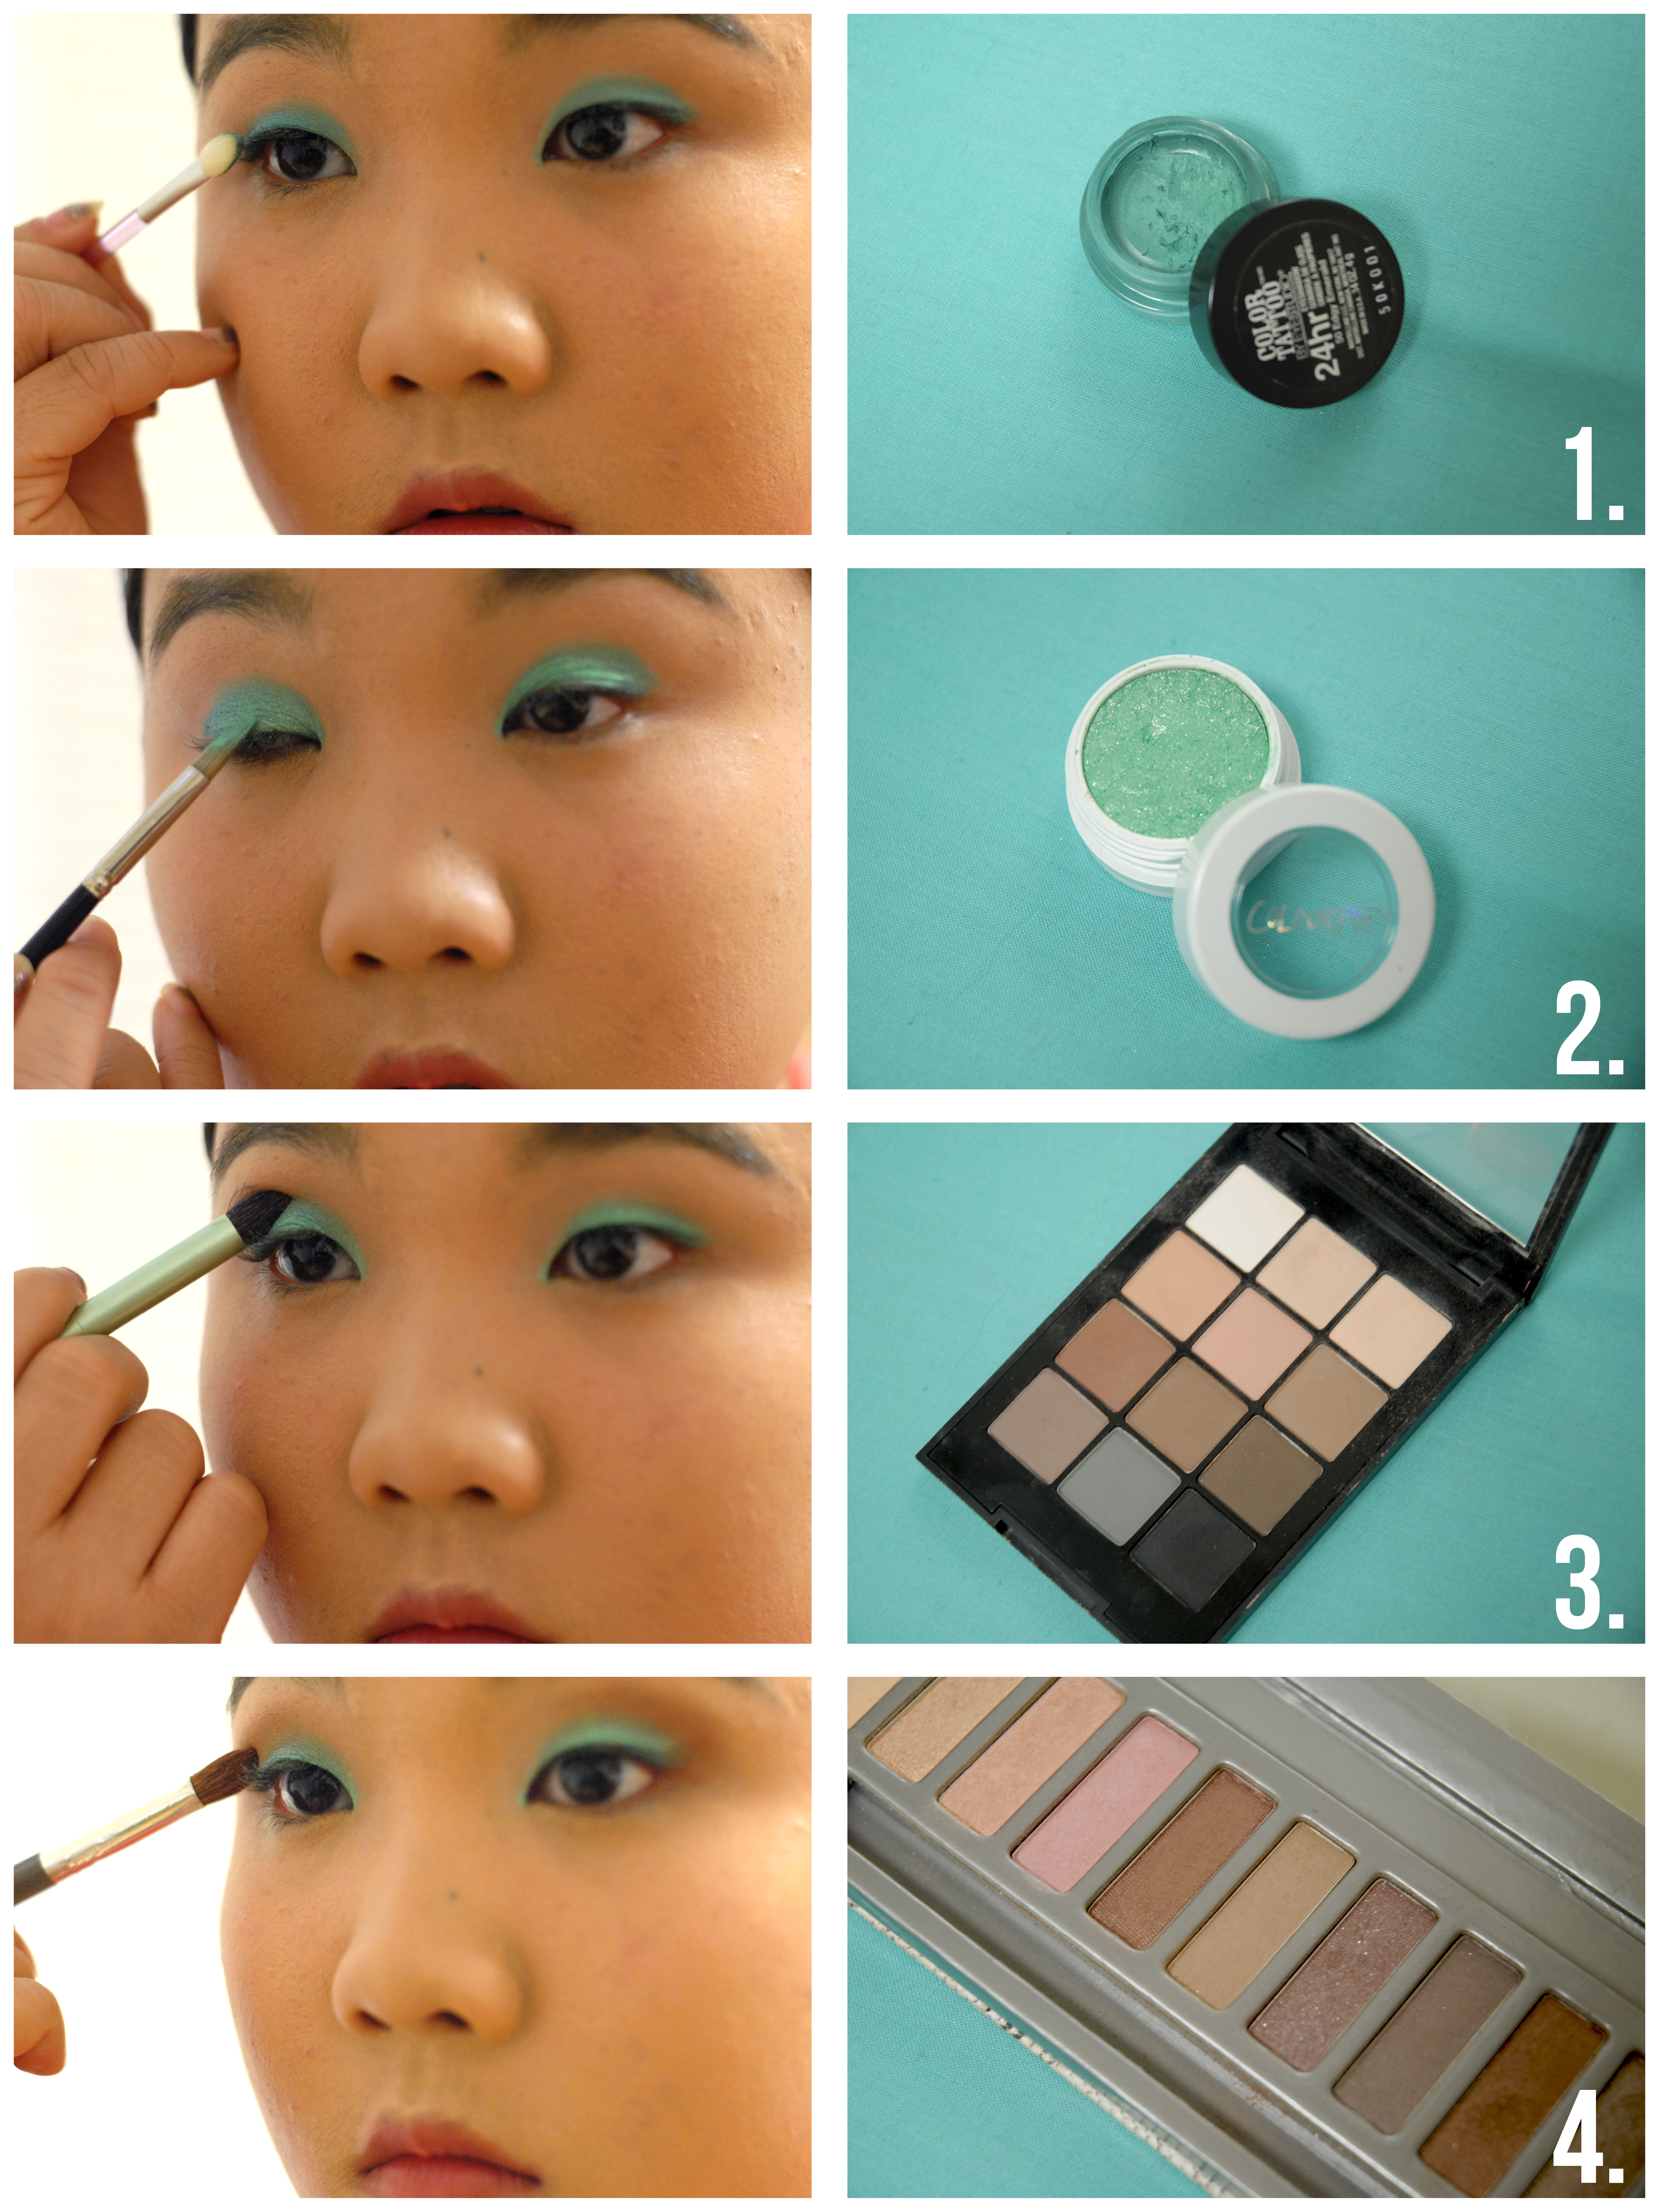
- Apply a cream base in either white or a similar color so that the mint color is more vibrant. I used the Maybelline Color Tattoo in Edgy Emerald with one of those dinky sponge applicators that come with drugstore makeup. They have to be good for something, right? Keep the color concentrated on the lid and do not go into the crease. Apply more heavily towards the inner corner.
- Using a flat shader brush, apply a mint shadow over the cream base. This is Colourpop’s Chipper shadow. These shadows are a cream to powder finish and go on very smoothly with a beautiful buttery texture, so keep that in mind while applying.
- Blend out the edge of the mint color with a matte color close to your skin tone. This is my Sonia Kashuk Mattes palette and I use the second color in the top row. It is available at Target, but is currently not available online.
- Take a warm toned matte brown through the crease to define it and create some dimension. Do not take the color into the corner and just run it through the crease in a wind-wiper motion with a fluffy brush. This color is Ooh La Latte from the Mally Citychick Celebration palette.

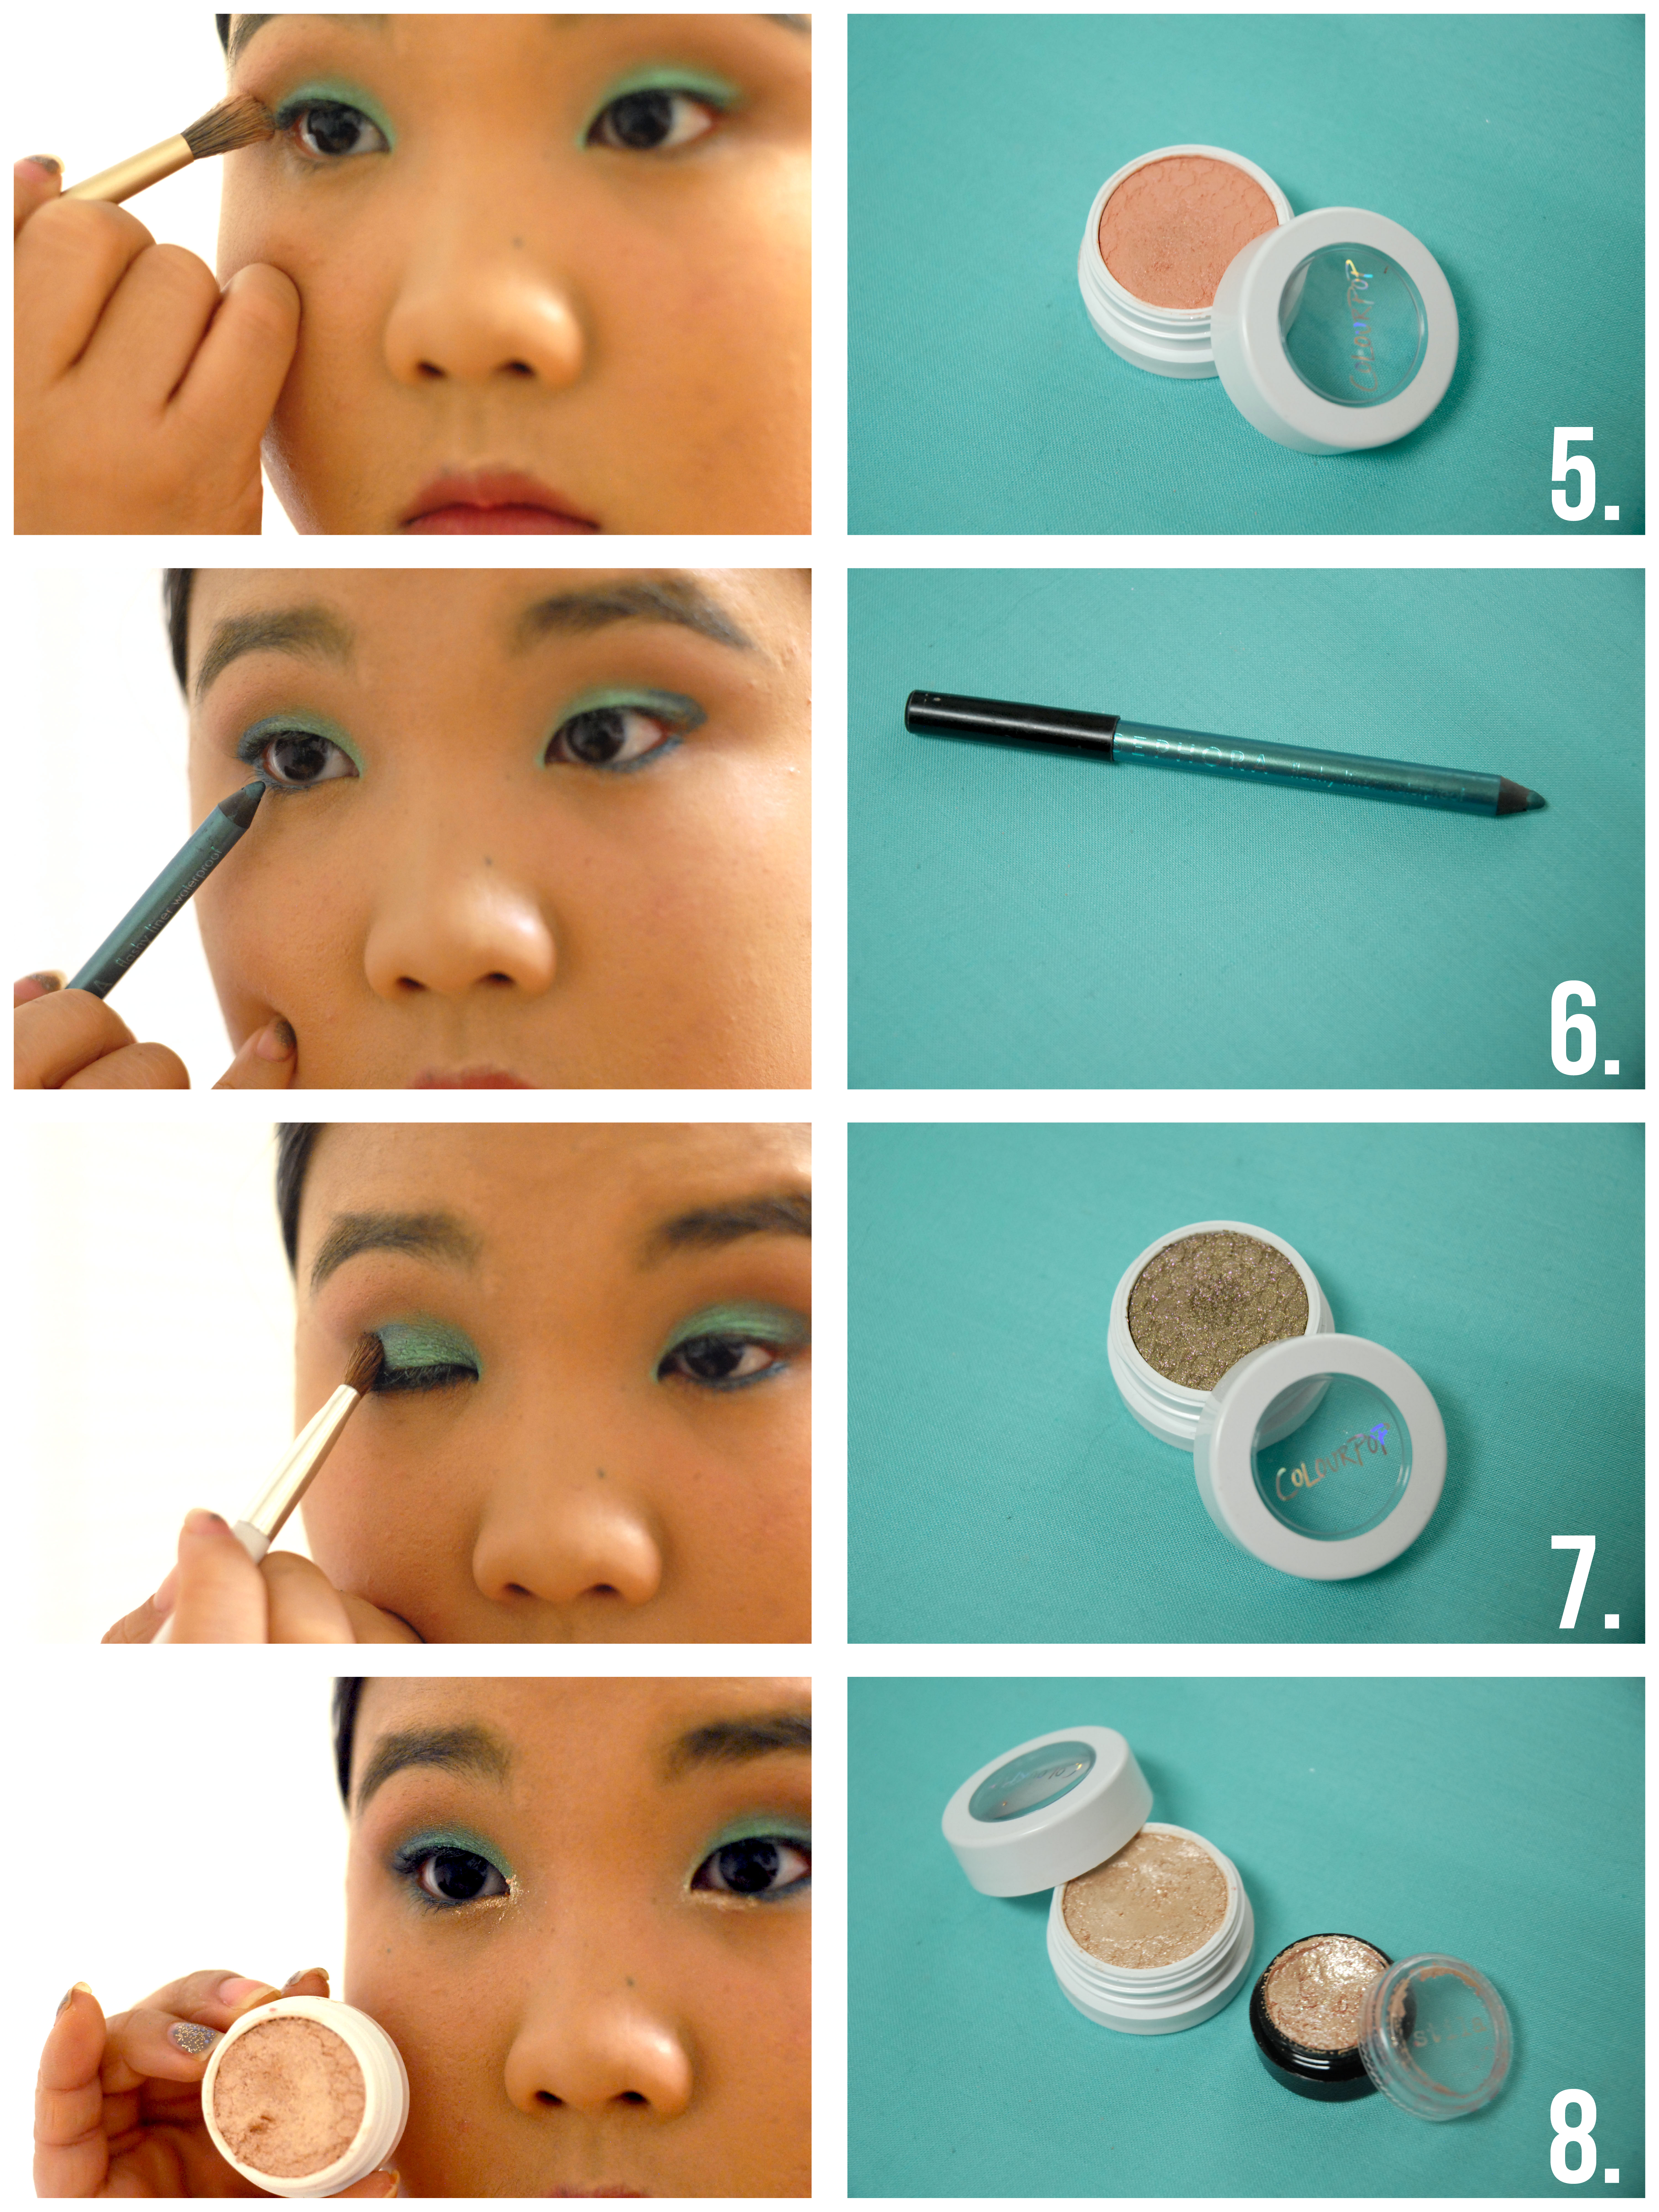
- With a blending brush, soften the outer edges of the brown with a matte coral color. I used Cheeky by Colourpop.
- Grab an eyeliner that is a few shades darker than the mint color. I used this teal Flashy Green liner from Sephora, however you can use a brown or gray. Put the liner into the outer color and slightly into the crease to act as a transition shade from the mint to brown. Bring the liner down onto the bottom waterline about two-thirds of the way in and connect it to the liner in the outer corner.
- Use a dense crease brush to blend the eyeliner into the outer corner and bottom of the crease to smoke it out. Use a dark brown shadow to go over the liner and deepen the smokey effect. I used So Quiche by Colourpop.
- Take a golden champagne color and put it in the last inner third of the bottom lashline. Use a lighter champagne shimmer or a light hand to highlight the inner corner of the eye. I started with Stila’s Kitten Magnificent Metals shadow (another cream to powder formulation but it starts out much wetter than the Colourpop shadows which are spongier in comparison) and swept Colourpop Lovely over the bottom waterline and into the inner corner.

- Curl your lashes and add mascara as you normally would. Don’t forget to add a coat to the lower lashes. Draw a thin bit of liquid liner on your upper lashline just to darken the area. Fill in your brows if you haven’t already. Clean up the under eye area with concealer and bring it out in a triangular shape to highlight the face. I used my everyday essentials: Tarte lash curler, Urban Decay Supercurl, Sonia Kashuk Arch Alert brow palette, Collection concealer and Revlon Colorstay liquid liner.
- Generously apply bronzer to give yourself a sunkissed-spring-break-glow. I used a bright coral shade of blush and applied from the apples of my cheeks up as far as to align to the tail of my brow. Don’t go up onto the temples, though. If you used the same blush as me, the cream to powder formula is easier to apply with a smaller, dense blush brush rather than a fluffy one. Highlight the tops of the cheekbones with a bronze undertoned highlighter. Highlight the high points of the face (under the eyes, chin, and forehead) with a lighter highlighter to give a dewy sheen to the face. I used: NARS Laguna bronzer, Colourpop Clutch blush, Hourglass Ambient Light Powder in Radiant Light, and MAC Mineralize Skin Finish in Soft and Gentle.

- Finally, finish off with a coral lip color. This is the Rocket Lippiestix by Colourpop. I found the satin finish of this a bit difficult to work with, especially since this is a super bright color. I apply from the bullet then blend in with my finger to sheer out the pigment. Powder your face and finish with a finishing spray to complete this look!


I hope you enjoyed this spring inspired look and try it out for yourself! If you do, be sure to tag me on social media (see below!). Let me know what you think of Coloupop in a comment below and have a wonderful spring break!
All my love,
Megan
—
Instagram || Twitter || Google+ || Pinterest || Bloglovin’

Love these two colors paired together. xo
LikeLiked by 1 person
Thank you! It’s one of my favorite color combinations 🙂
LikeLiked by 1 person
Great tutorial 😉
LikeLiked by 1 person
Thanks so much 🙂
LikeLiked by 1 person
You are welcome 🙂
LikeLiked by 1 person
Beautiful 😍
LikeLiked by 1 person
Thank you!!
LikeLike
Gorgeous! Chipper’s definitely going on my wishlist!
LikeLiked by 1 person
Thank you! It’s a gorgeous color- I hope you can get your hands on it soon!
LikeLiked by 1 person