


Hello, all! I don’t know about you, but I jumped onto that short-mid length-lob haircut bandwagon a while back and now I’m stuck at an awkward growing out stage with my hair which I can find difficult to work with. That said, I wanted to show you my solution using some products which I have mentioned recently. (Disclaimer: I am in no way a hair expert, but I just wanted to share the things that have been working for me, especially if you have difficult, thick, hard-to-curl hair like myself.) If you recall last week’s post I featured this NuMe 25 mm Magic Curling Wand and the post before that I also gave credit to this Healthy Sexy Hair Soy Touchable hairspray. Between this duo I have found my power couple of hair styling products, honestly they are my Beyoncé and Jay-Z of hair! With a few helper products, you have all you need to create beautiful bouncy waves that are super versatile. So without further delay, let’s get started!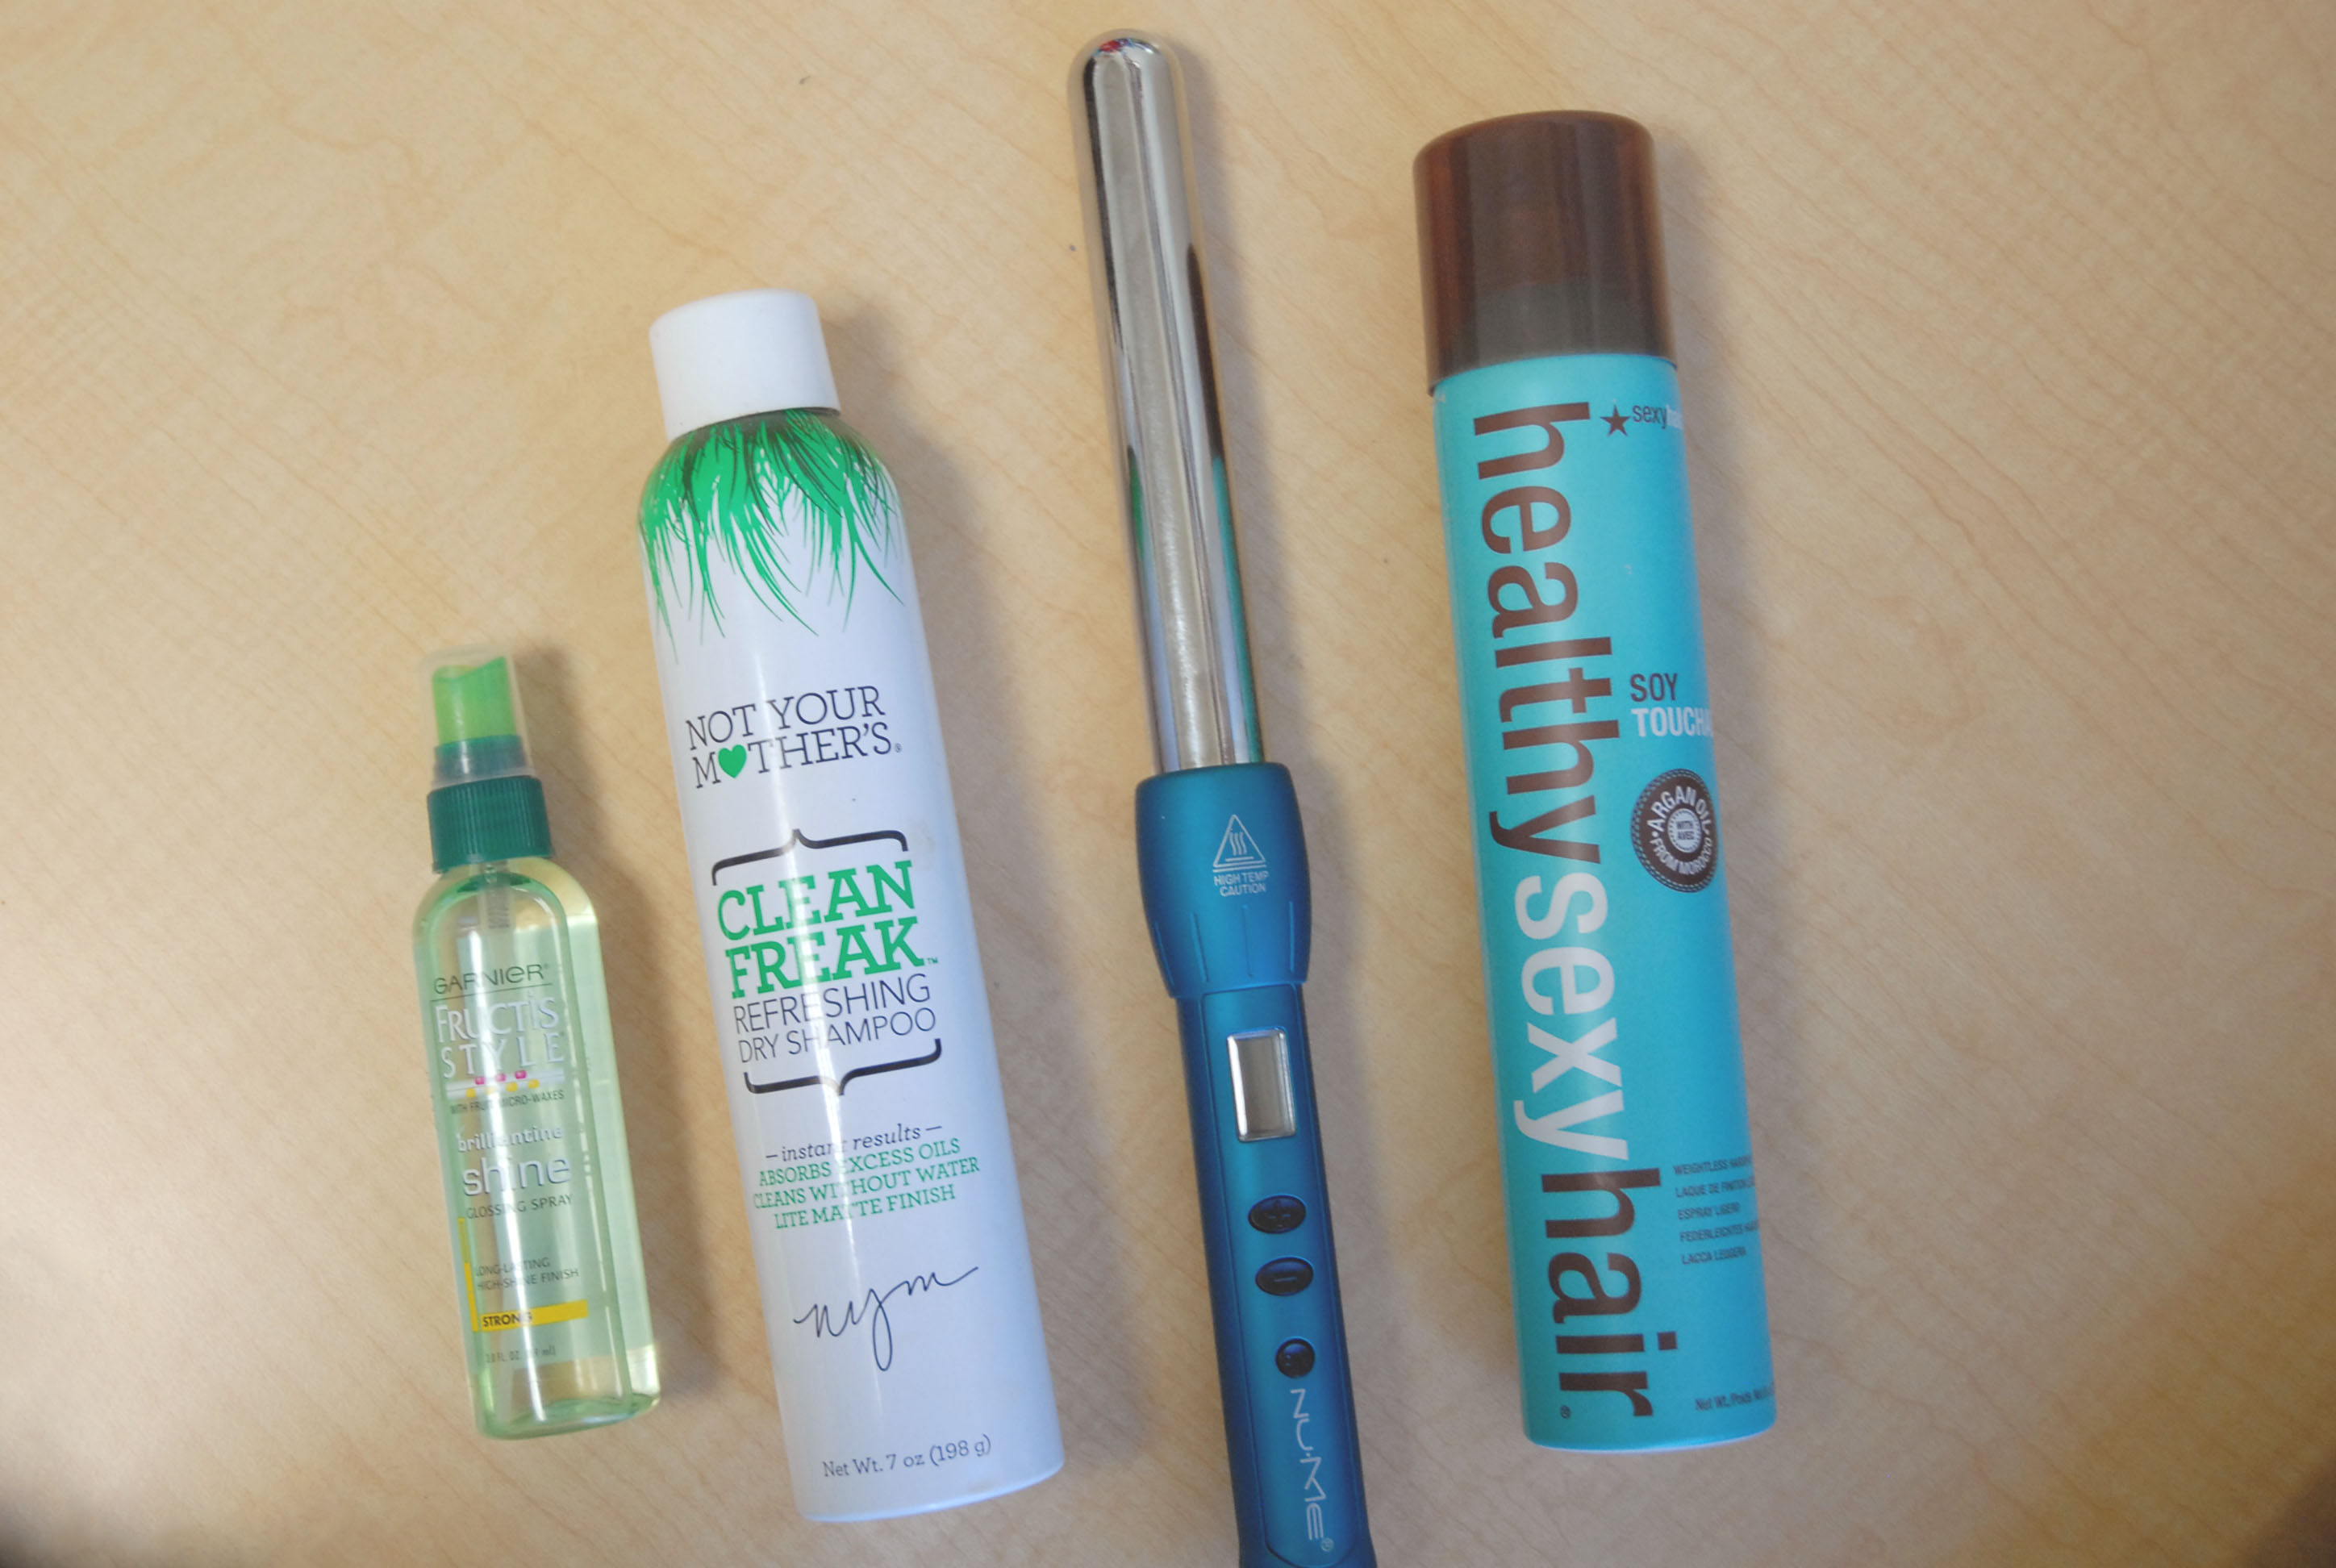
First off, the things you will need are as follows:
- Shine spray– This is the Garnier Fructis Brillante Shine. I use this as a finishing product to smooth out frizz and I prefer this to serum since it does not weigh down my hair. However, any frizz or smoothing product will do.
- Dry shampoo– If you need the volume or are working with second day hair, like me, then have some of this staple on hand!
- Curling Wand– The Nume 25 mm Magic Curling Wand is absolutely magic as the name suggests. I raved about it in my Winter 2015 Favorites post and if you would like more details on this product I would suggest giving that a read but, essentially, this is the perfect size barrel for versatile styles and the titanium allows for thorough heat to distribute on the hair and creates a long-lasting curl.
- Hairspray– I adore this Healthy Sexy Hair Soy Touchable hairspray for its strong hold without leaving residue or crunch. For more details see my Argan Oil post or 2014 Favorites.
- Clips– Not pictured, but any clips that will work with your hair texture to section off hair will do.
- Heat protectant– Also not pictured, but I forgot this step! Don’t forget to save your hair from split ends!
Now, for the tutorial!
 First off, let me preface this with the fact that it is absolutely impossible to take nice pictures of your reflection, so I apologize for my weird facial expressions and also for this ugly background of my dorm window. With that said, here’s the nine easy steps you need to achieve this look! (Insert cheesy infomercial voice over here.)
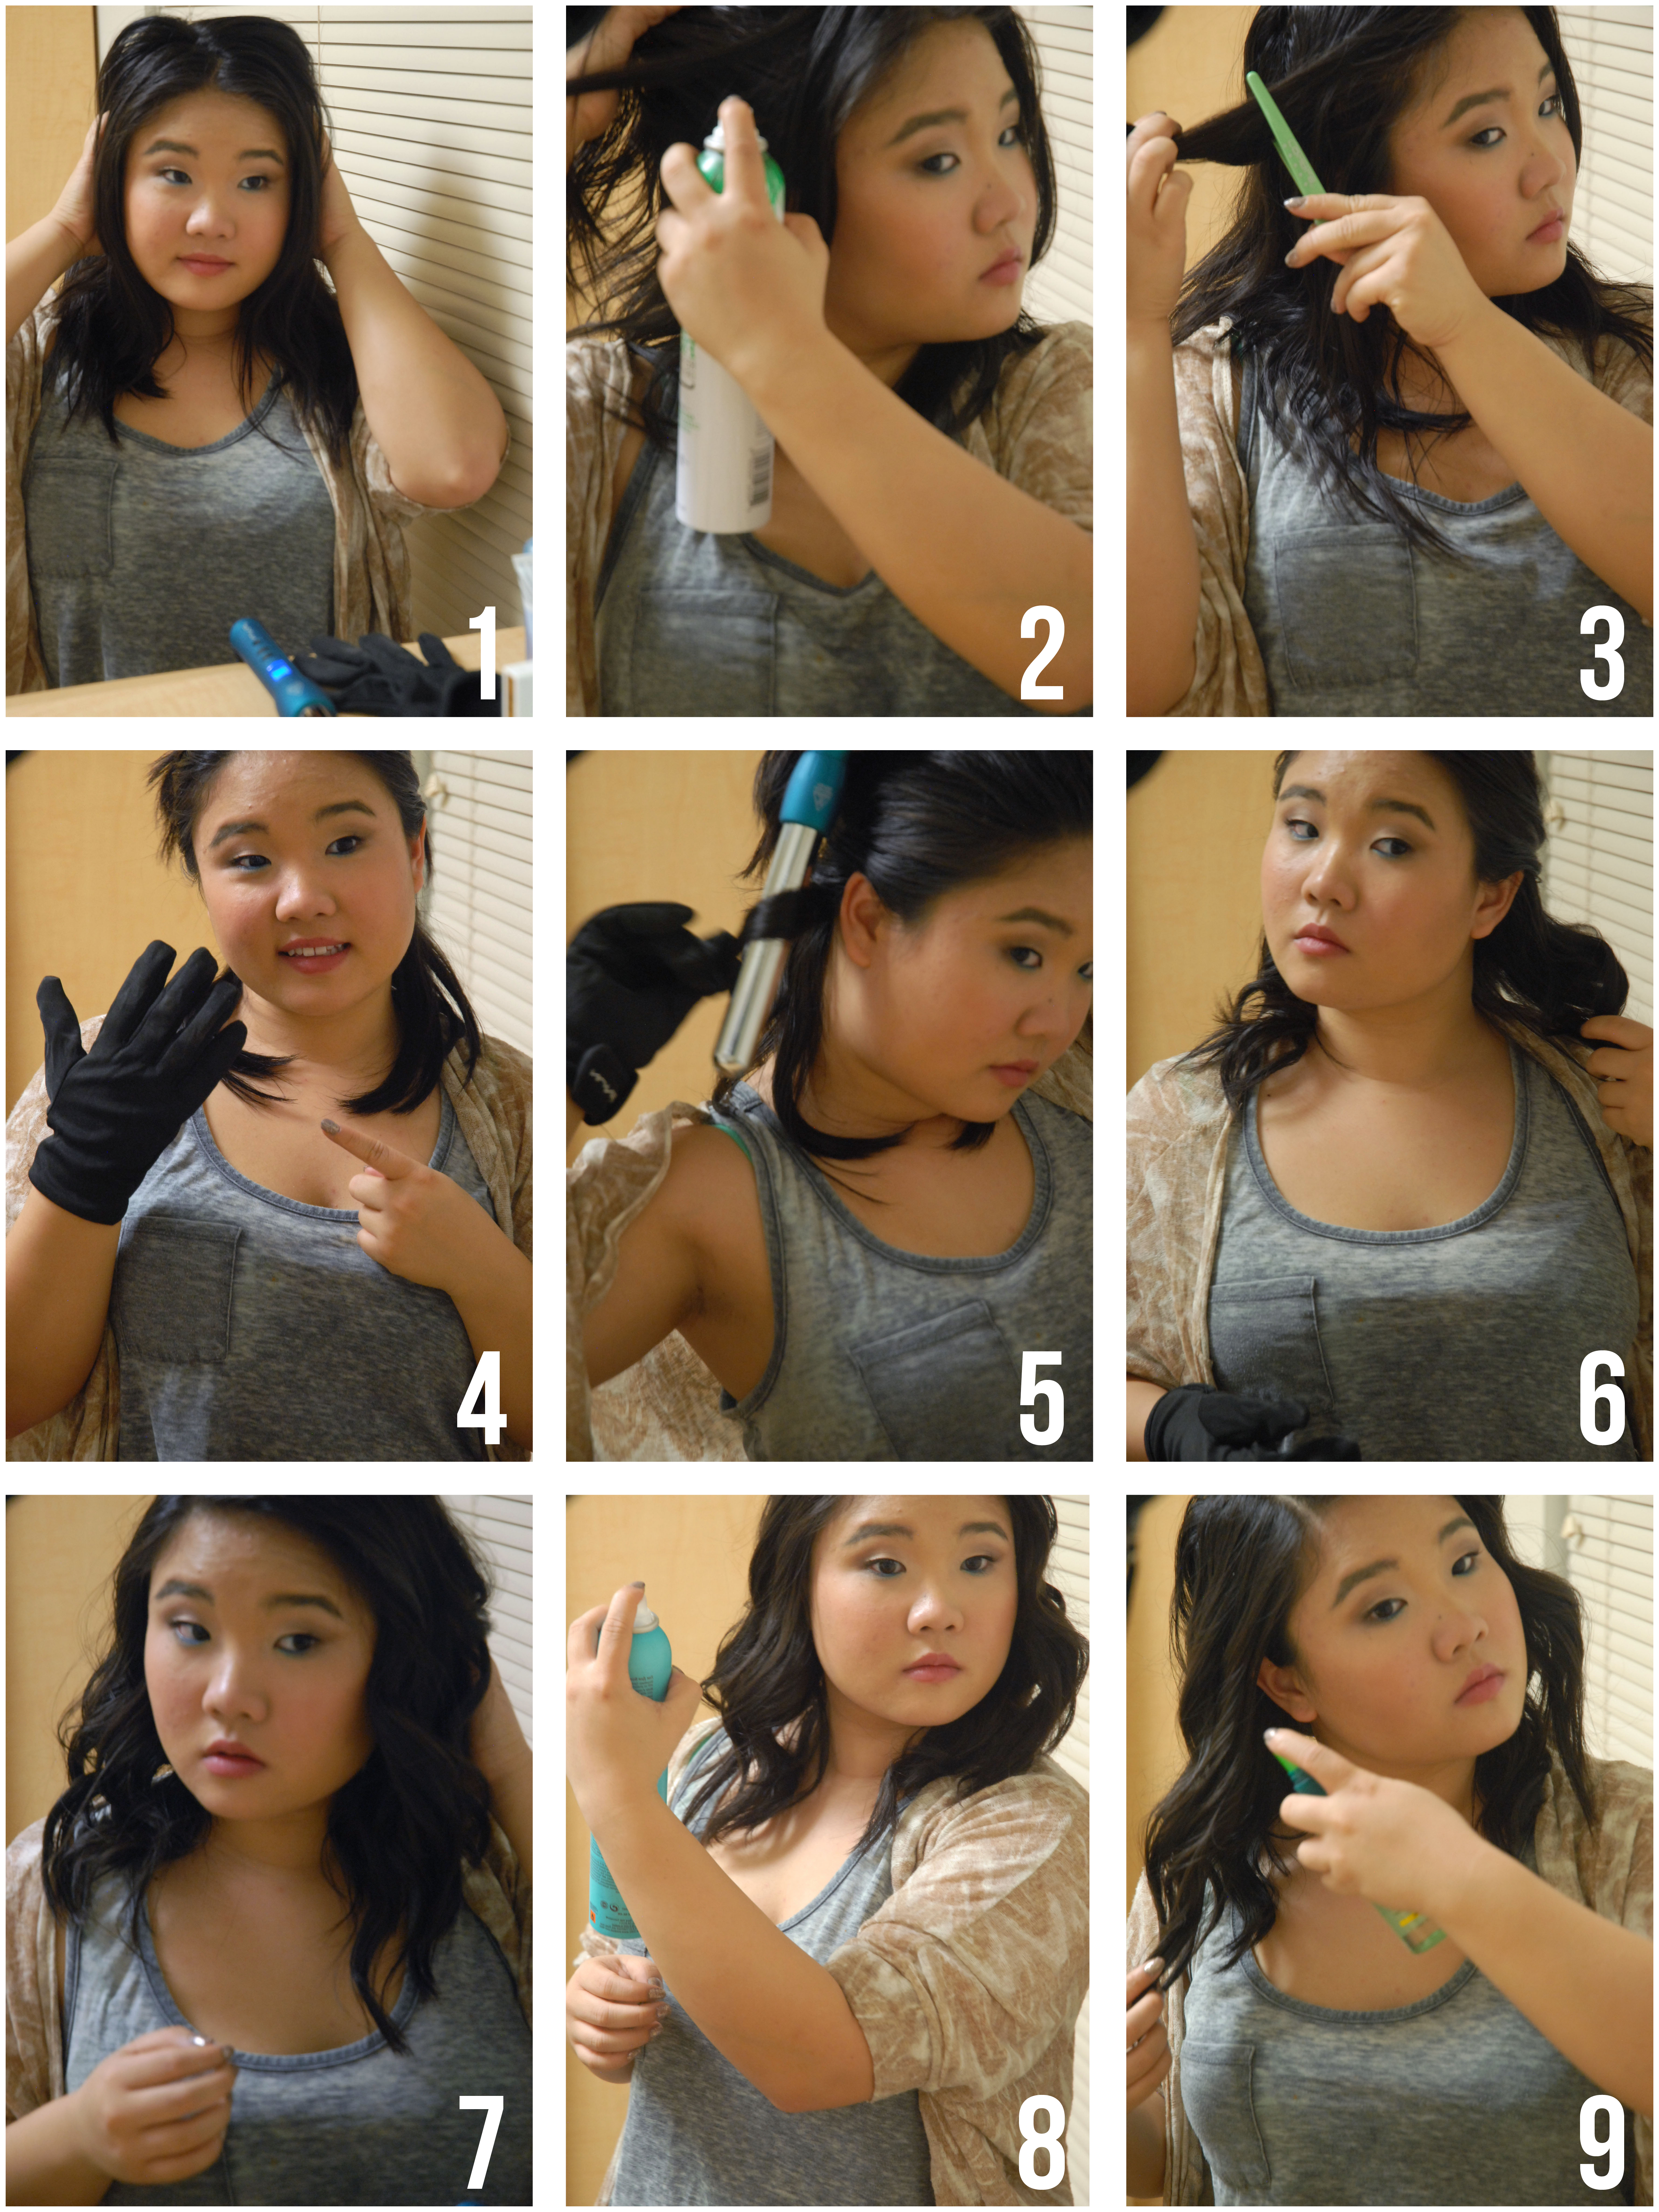
- I’m starting with second day hair here, however this will depend on your own hair texture or even just the type of hair day you are having, if that makes sense. Allow me to explain. When I washed my hair the day before, I had used a purifying shampoo to remove some product build up, leaving my hair drier than normal and overall less silky. I waited a day to style so that the natural oils in my hair would build up some texture and if you have normal to dry hair I would suggest doing the same. However, on a typical shower day my just-washed hair is the perfect texture for styling the next morning. Normally I have quite silky hair and if I let oils build up I find that the curls do not last as long since the hair is too slick to style. In fact, when I curled my second day hair here the curls did not last over night, which usually happens when I work with freshly washed hair. Basically, work with whatever washed state works for your hair.
- Since this is second day hair, I added dry shampoo to the roots to remove grease and build up some volume in the roots. If you have flat roots, I would highly recommend building up volume since the curls we are creating will be so full that it will look odd to have the top sections laying flat against the head. Also, comb some heat protectant through to protect your ends from splitting. I forgot this step, so a fair warning!
- Section off everything above the ear and begin working with just the bottom bits. I like working in three sections around the head- bottom, middle, and top but prefer to pin it all up at once and let down sections as needed.
- Here is me giving you an awkward reminder to use the glove that comes with the curling wand! I heat my iron up to the highest temperature setting at 450 degrees Fahrenheit so it is absolutely essential to use heat protection, especially if you have shorter hair with layers, since you will need to pull the hair taut close to the iron in order to construct the proper curl. Turn the temperature dial on your iron accordingly. Use lower heats for thinner hair (250 degrees) and add from there. This iron heats up to 450 which is a good temperature for me, since I have difficult, thick hair, however it is not a temperature for everyone, so be warned.
- If you have an A-line structure like my haircut, then your bottom layers towards the back will be shorter and difficult to create a full curl. For these pieces, I just focus on creating a bit of a wave in these sections. I also alternate directions of the curl, wrapping both away and towards my face. This creates more volume at the base and a nice foundation for the curls above. I hold my iron behind my head, facing downwards so that the wave is at a nice diagonal and falls off the barrel after I’m done curling. Hold pieces around the barrel for 10-15 seconds, then let it fall into your palm to cool. Continue holding the curl in your hand until it is cool so that the integrity of the curl locks into place.
- For the middle layer, take 3/4 inch vertical sections and start focusing the direction of the curl primarily away from your face, especially towards the front. For my wrapping technique, I like to wrap the top of the section, closest to the roots, flat against the barrel, then twist the ends together before wrapping it around the iron. See the first example below. This creates a more conical shaped curl which leaves a lot of the bulky volume on top and tapers the ends out. Th
 is creates a more relaxed curl since the ends are wavy as opposed to curly. In addition, twisting the ends allows any layers you may have to get curled since they will not pop out and miss the iron. I hold these curls in place for 15-20 seconds, just a bit longer, since these sections are larger. I also let these curls cool half-way in my palm before releasing them, so that they are not too tight.
 - With the top layers, use larger 1 inch sections and continue the same wrapping and releasing techniques. Wrap all sections away from the face and pay extra attention to the pieces towards the front which frame the face. Once you have finished, gently begin to tousle the ends so that they are no longer twisted together. You should end up with something similar to the picture above.
- Use a light layer of hairspray. Be sure to pick up the ends to reach the bottom and middle layers. Scrunch the hair upwards to set the curls in place.
- Finish off with a smoothing treatment! I use it mostly to smooth flyaways on the top of my head and take away frizz at the ends. Comb gently through the ends to smooth everything out and loosen the curls, gently.
- You’re finished!
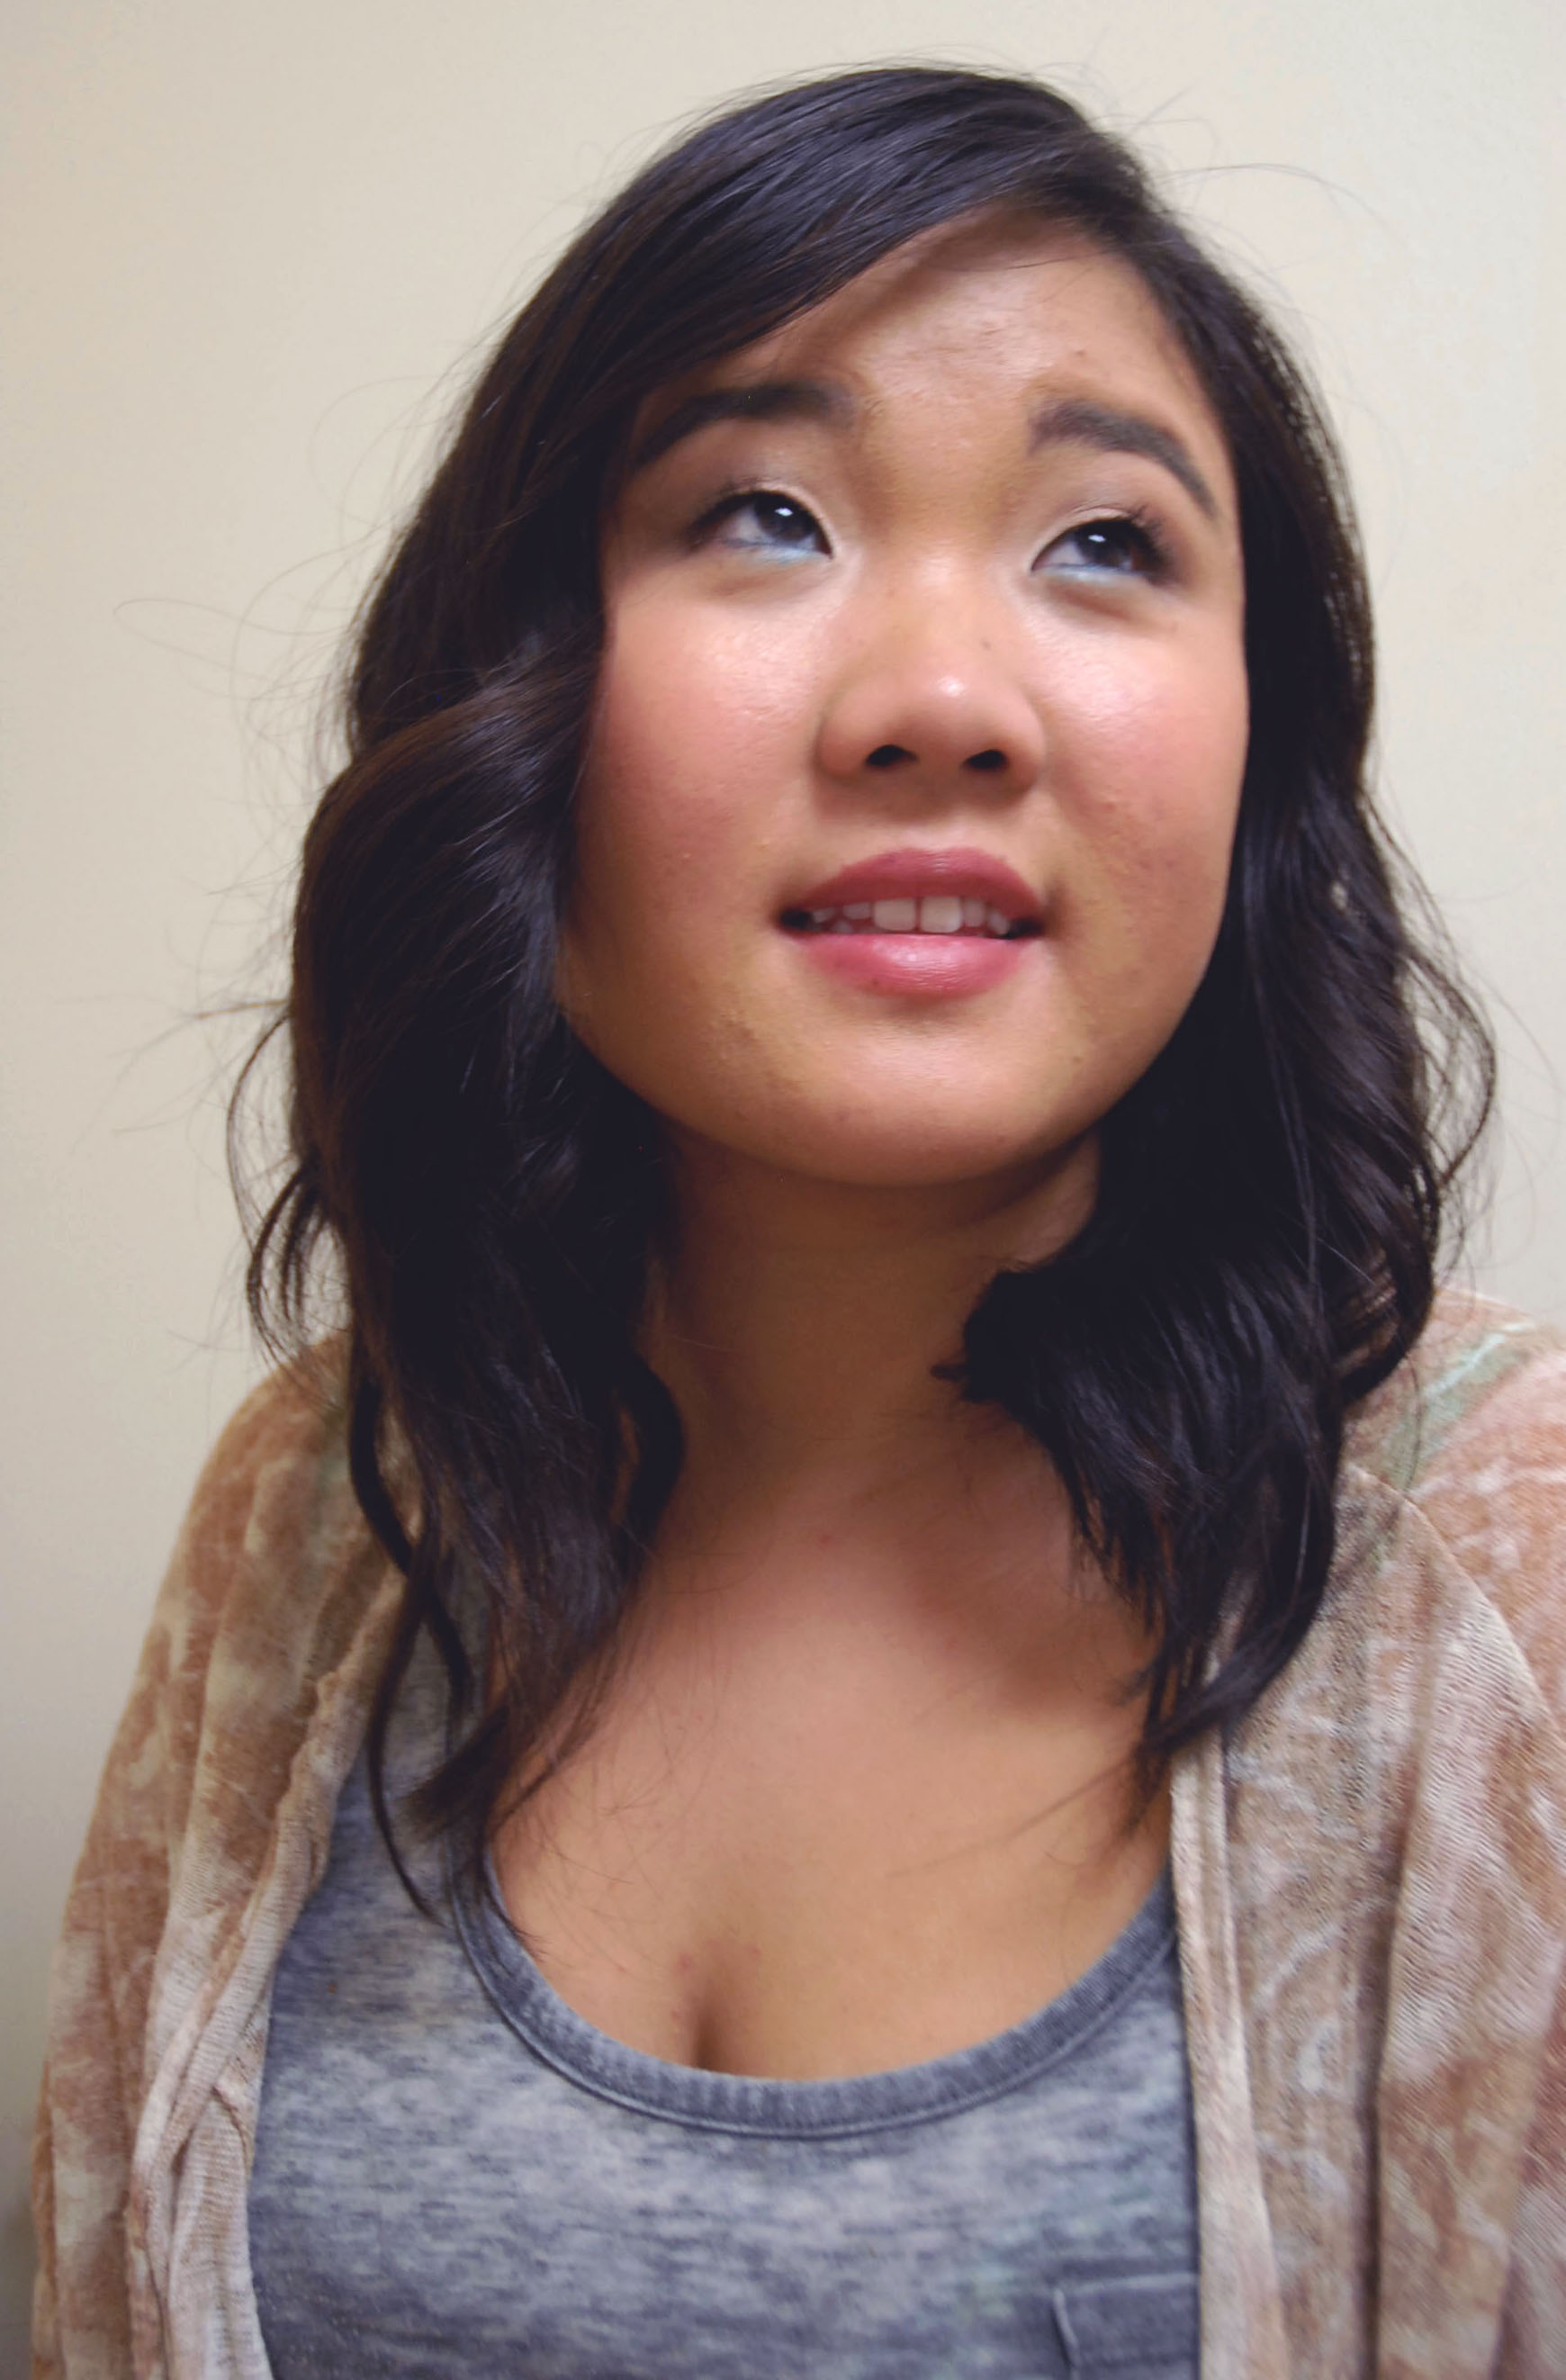
Congrats, you’ve made it to the end! I love these curls since they can be pulled back during the day or let down and worn out at night or to an event. This technique also leaves beautiful second day waves for the perfect “lived in” look. This took overall 15-20 minutes to achieve, a record for my hair which used to take an hour to curl since I would have to keep re-curling sections. It is not a super-quick style, however if done properly, can last up to two days. If you curl larger pieces and section off only a top and bottom, you can cut down on time, but your curls will be more wavy and loose and last for less time.
Thanks for reading, and I’ll catch you soon! I hope you have found this tutorial helpful and if you try it out be sure to tag me on social media using the links below!
All my love,
Megan
—
Instagram || Twitter || Google+ || Pinterest || Bloglovin’

One Reply to “”